

Creating Routes
Now that you have deployed the STLink on the Commander machine that contains a Mapping Route (aka, a resource that's being served from the Commander), let's add another Mapping Route to that same Commander STLink.
Creating a Mapping Route
Let's create a Mapping Route for the Commander Portal, so you can easily access it from the web browser on another authorized machine running the STLink.
The Commander Portal listens on the loopback address 127.0.0.1 and port 10466.
Let's create this new Mapping Route:
- Sign in to the Commander Portal with your Administrator credentials.
- Navigate to the Routes tab in the left navigation bar.
- Click the orange + New Route button in the top left of the Routes View.
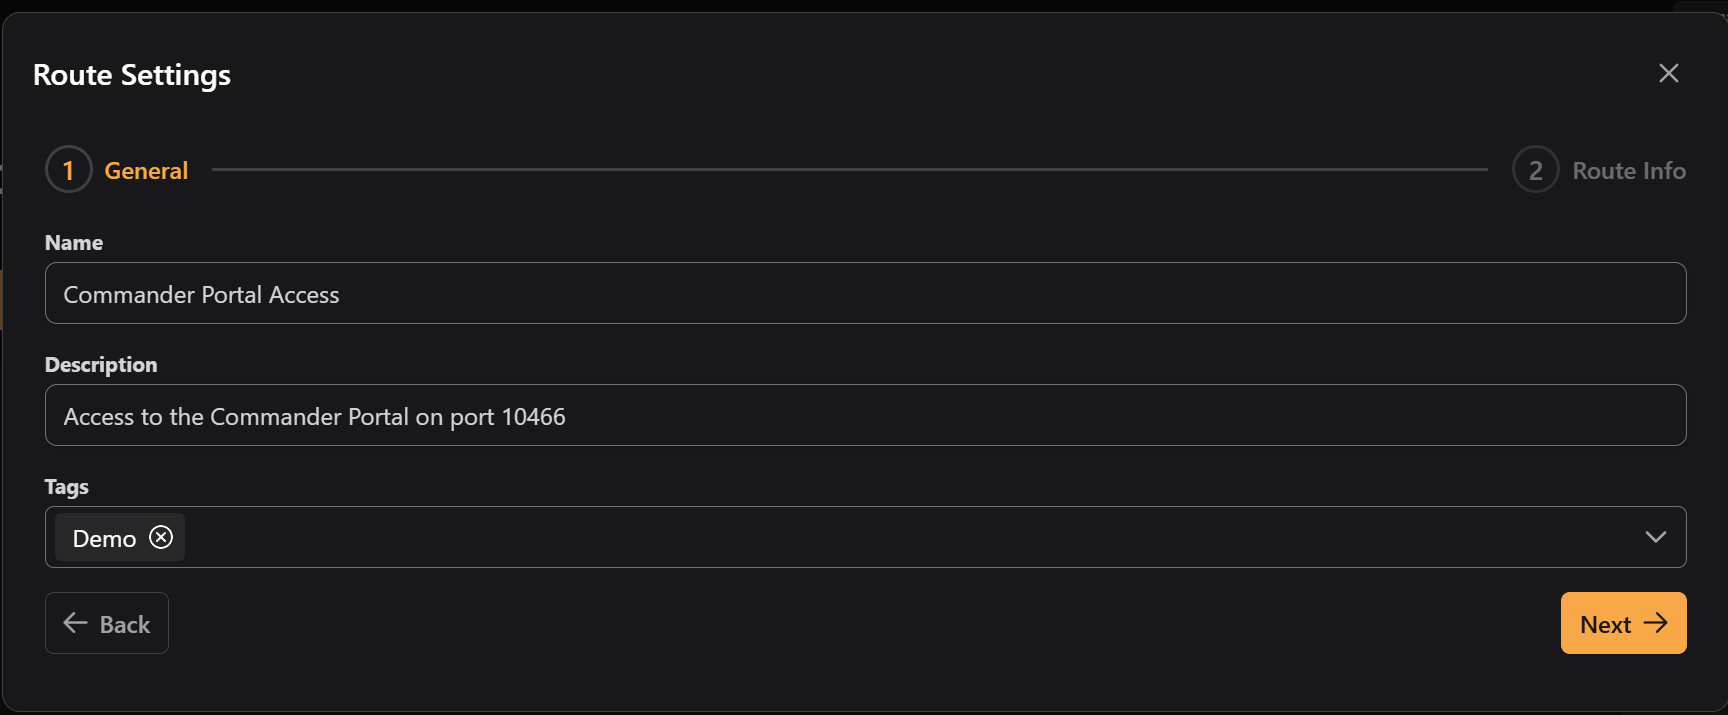
- In the Routes Modal, enter
Commander Portal Accessin the Name field. - Enter
Access to the Commander Portal on port 10466in the Description field. - (Optional) Select any tags you wish to associate with the Route.
- Click the orange Next button in the bottom right of the modal.
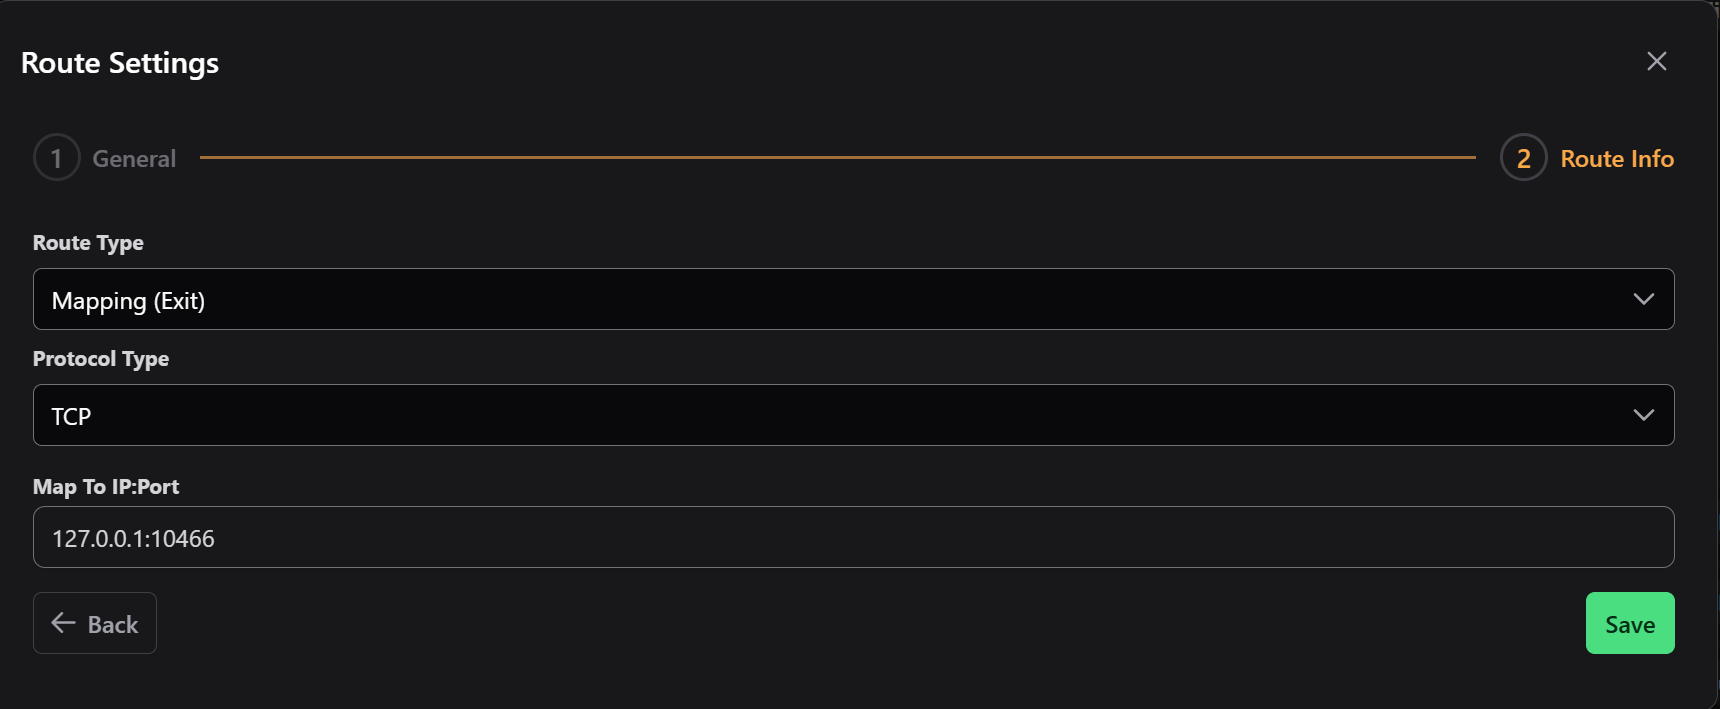
- In the Route Info section, select Mapping (Exit) for the Route Type.
- Use TCP as the Protocol Type.
- In the Map To IP:Port field, enter
127.0.0.1:10466to route the connection to the Commander Portal. - Click the green Save button in the bottom right of the modal.
You will now see a new Route listed in the Routes table of the Routes View.
We'll assign this Route to your Commander STLink later, on the next page of the guide (Managing STLinks).
Creating a Binding Route
INFO
Operating Systems enforce that only one process can bind to an address and port. Many services bind to 0.0.0.0 on a port. This locks up the port against use by any other process, including the STLink. We've chosen examples below that are unlikely to create an issue on your system, but if they do, you can always change the binding address and port.
Up to this point, we've created two different Mapping Routes for your Commander's STLink: one for RDP/SSH access to the Commander machine (deployed to your Commander's STLink), and another to access the Commander Portal directly (not yet deployed to your Commander's STLink).
This means that we have the ability to "serve" this first resource from an STLink, but no (client) STLink to access it from!
This is where Binding Routes come in.
Let's add one Binding Route now.
We'll create a binding route to access your Commander via RDP or SSH from a client STLink.
For Linux, we'll use SSH, and for Windows, we'll use RDP:
- Sign in to the Commander Portal with your Administrator credentials.
- Navigate to the Routes tab in the left navigation bar.
- Click the orange + New Route button in the top left of the Routes View.
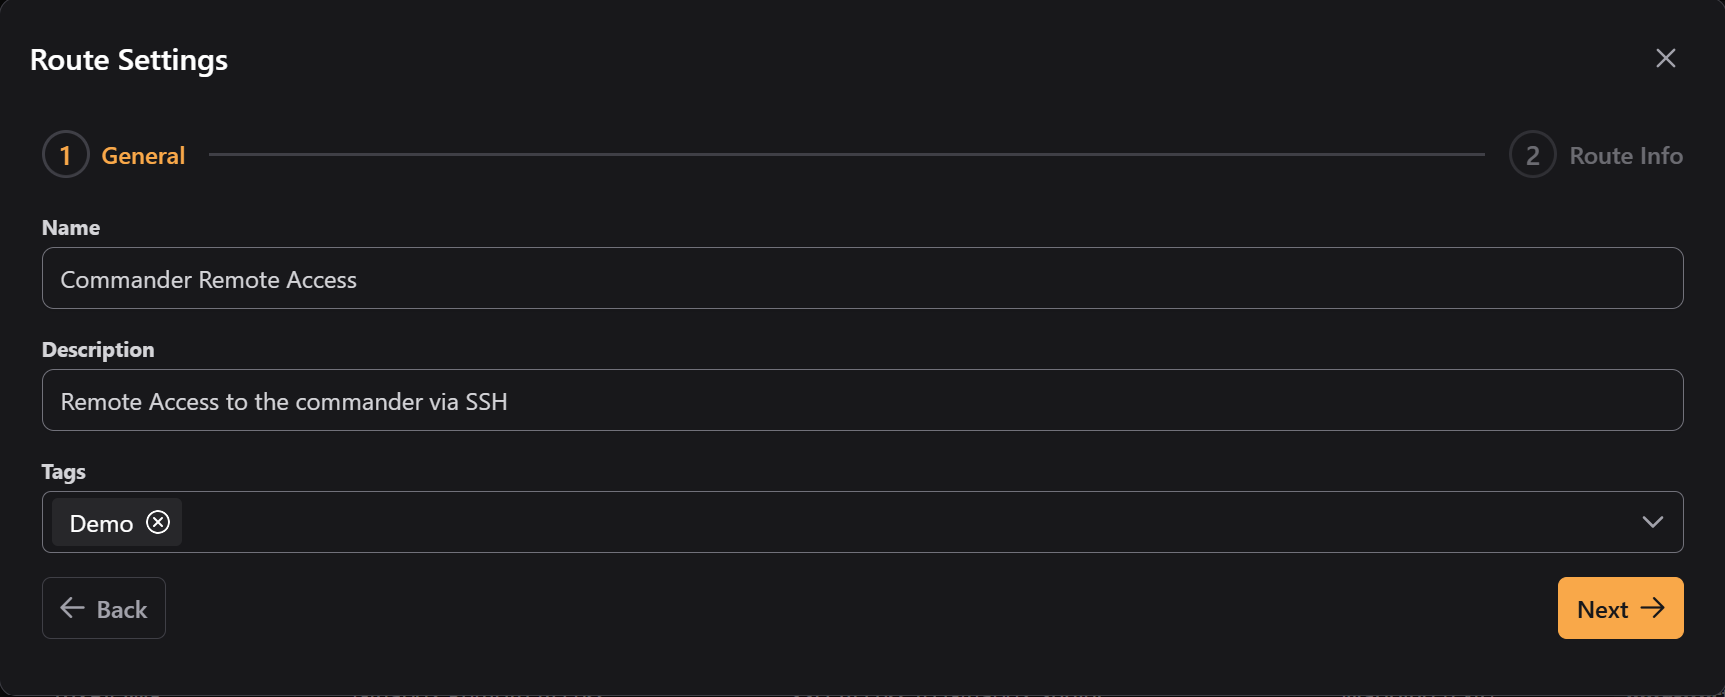
- In the Routes Modal, enter
Commander Remote Accessin the Name field. - In the Description field, enter the following:
Remote Access to the commander via RDPRemote Access to the Commander via SSH- (Optional) Add any Tags you would like to the Route.
- Click the orange Next button in the bottom right of the modal.
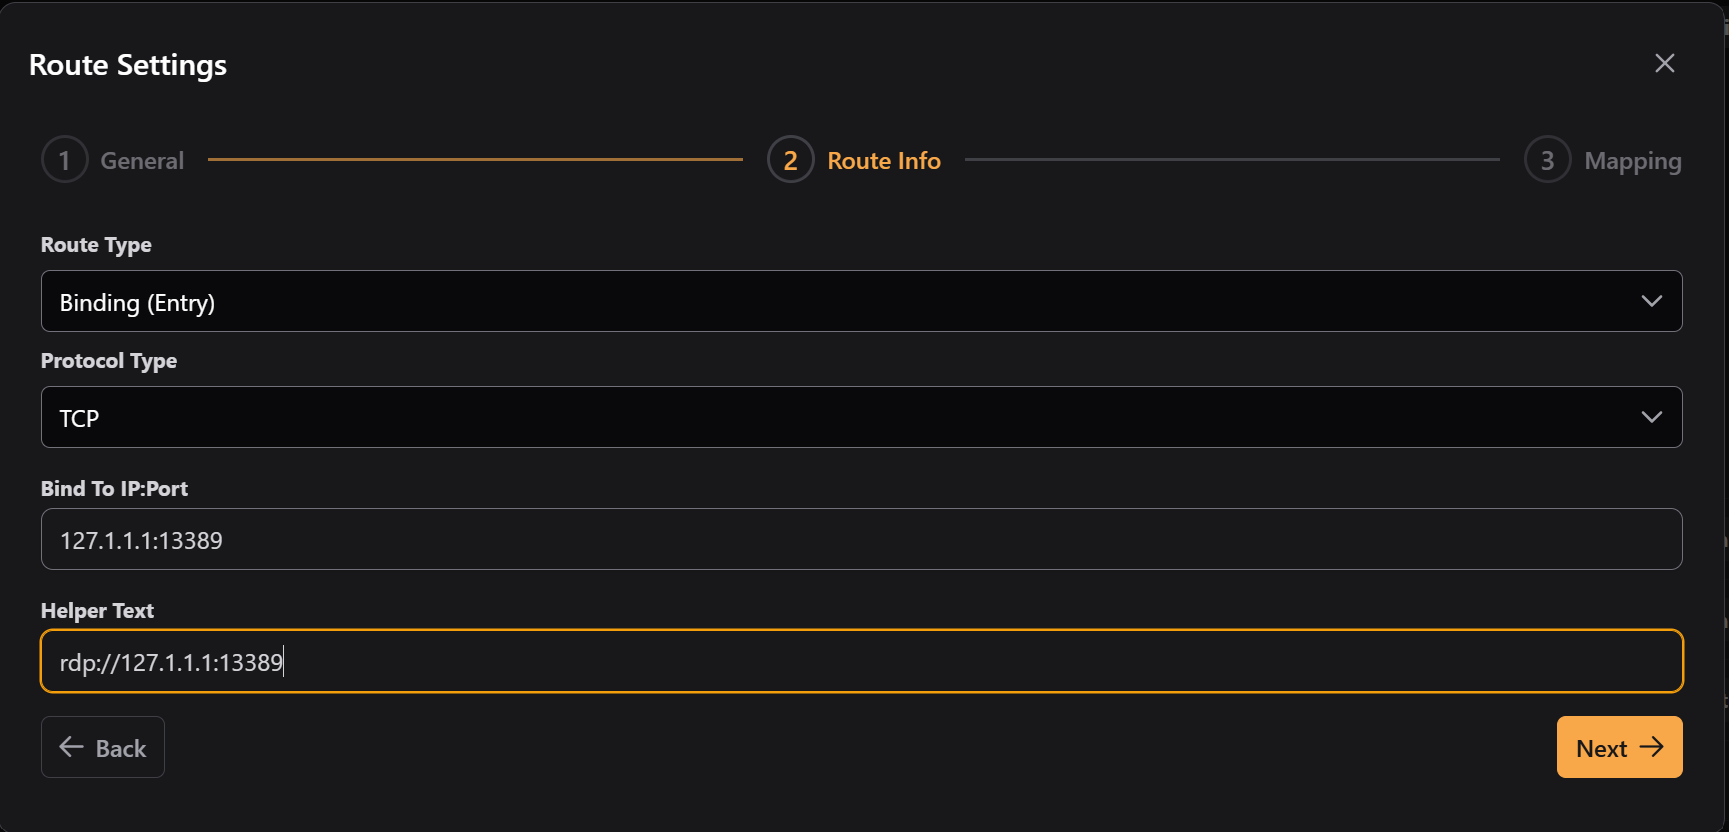
- In the Route Info section, select Binding (Entry) for the Route Type.
- For the Protocol Type dropdown, select TCP.
- In the Bind To IP:Port field, enter the following:
127.1.1.1:13389127.1.1.1:1022- In the Helper Text field, enter the following:
rdp://127.1.1.1:13389ssh://127.1.1.1:1022- After reviewing the information, click the orange Next button.
- In the Mapping STLink step, select the Commander STLink by its Hostname in the STLink to Route to dropdown.
- In the STLink Mapping datatable, select the SSH or RDP Mapping Route you created in the Profiles section.
- Last, click the green Save button in the bottom right of the modal.
You will now have a Binding Route listed in the Routes table of the Routes View. We'll assign this to a client STLink on the next page of the guide (Managing STLinks).
Now, try adding a Binding Route that corresponds to the Commander Portal Access Mapping Route you created earlier. See below for the "answers" if you get stuck!
Expand for full instructions on adding the Commander Portal Access Binding Route
- Sign in to the Commander Portal with your Administrator credentials.
- Navigate to the STLinks tab in the left navigation bar.
- Find the client STLink and click on the row in the table.
- In the STLink Modal click the Routes tab.
- Click the orange Add Route dropdown button and click New Route.
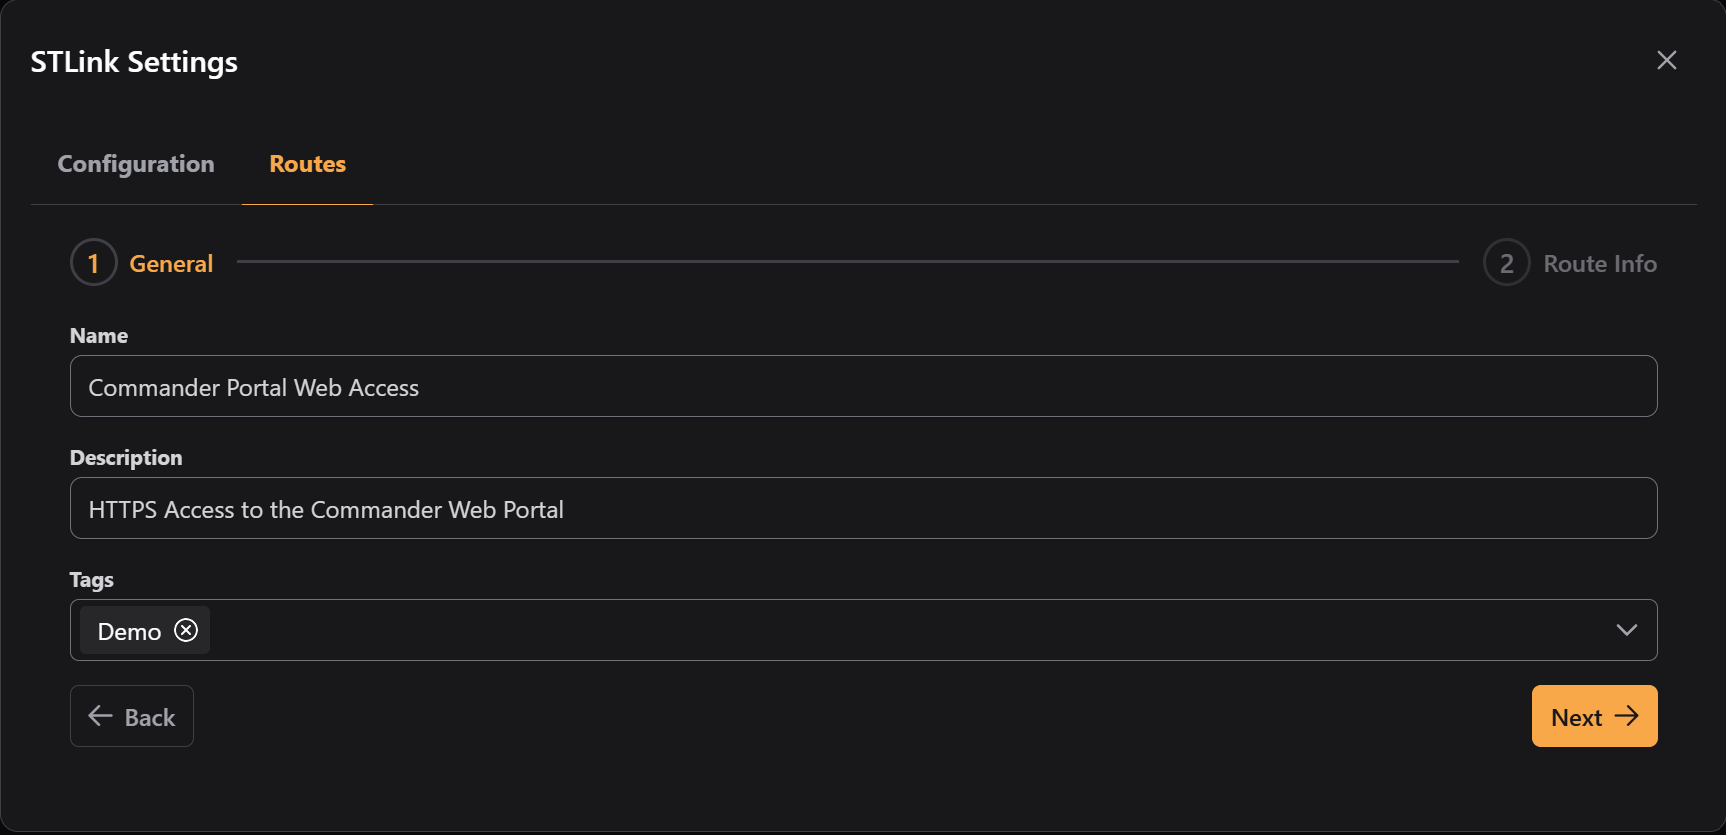
- In the Route Configurations section, enter
Commander Portal Web Accessin the Name field. - For the Description, enter
HTTPS Access to the Commander Web Portal. - (Optional) Add any Tags that would like from the Tags dropdown.
- Click the orange Next button in the bottom right of the modal.
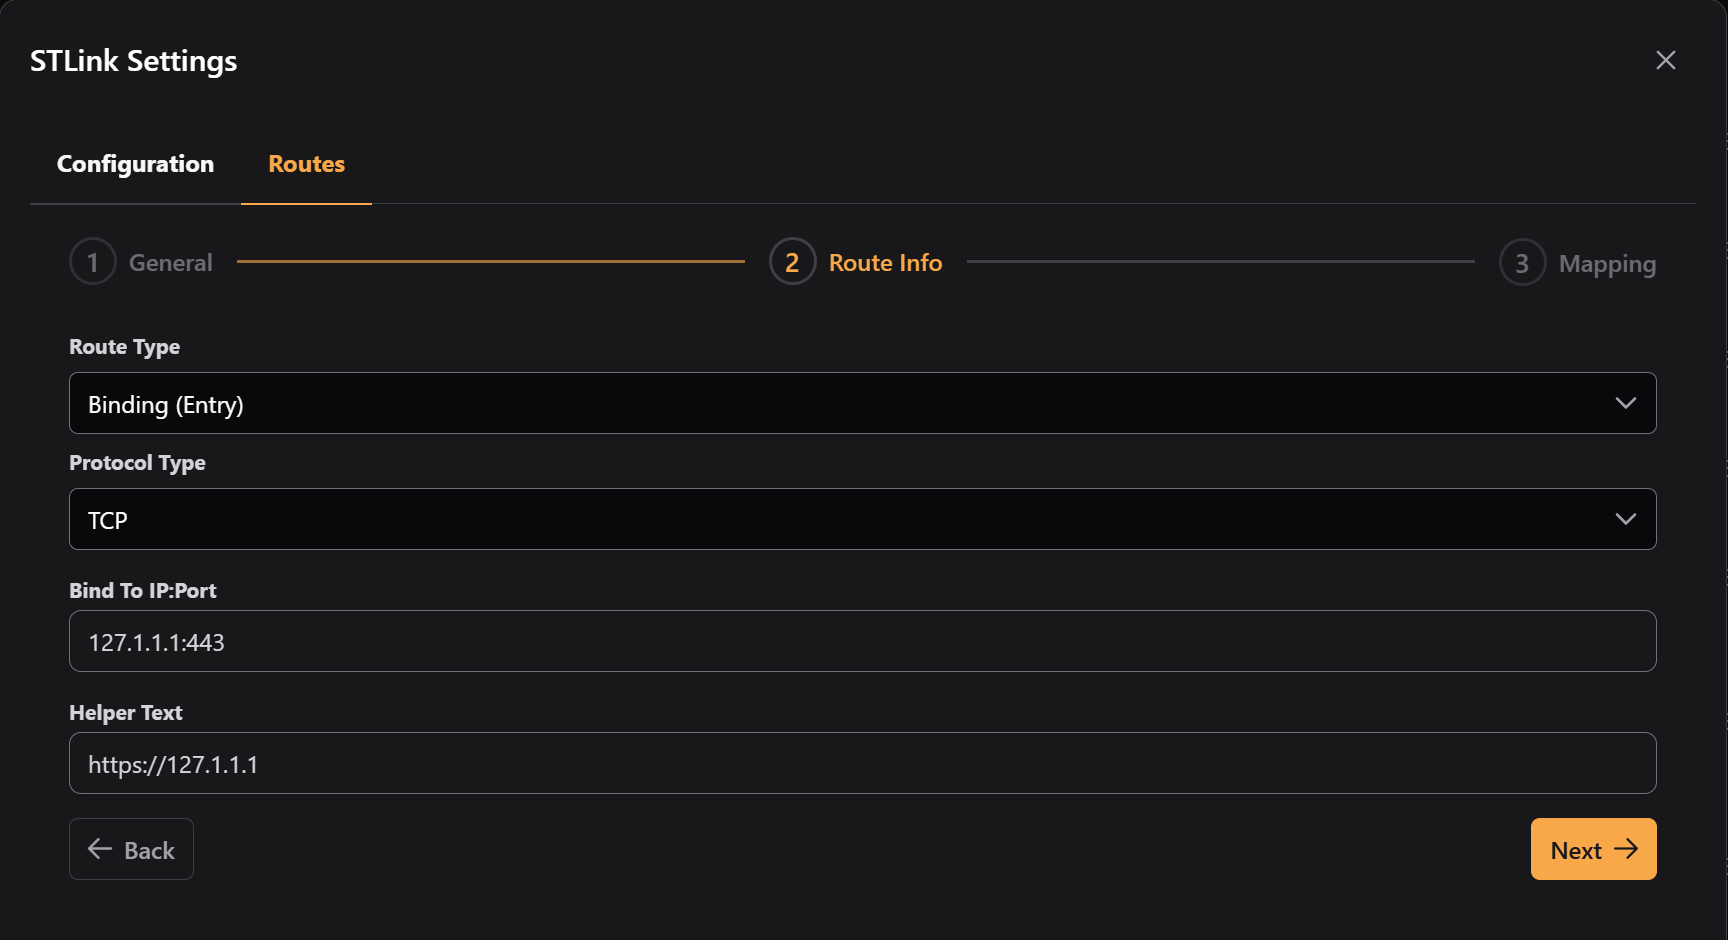
- In the Route Info step, click the Route Type dropdown and select Binding (Entry).
- In the Protocol Type dropdown, select TCP.
- In the Bind To IP:Port field, enter
127.1.1.1:443.- For information on why we are using port
443, see the Domain Routing section.
- For information on why we are using port
- In the Helper Text field, enter
https://127.1.1.1. Port443will be inferred in the browser by the HTTPS protocol. - Click the orange Next button in the bottom right of the modal.
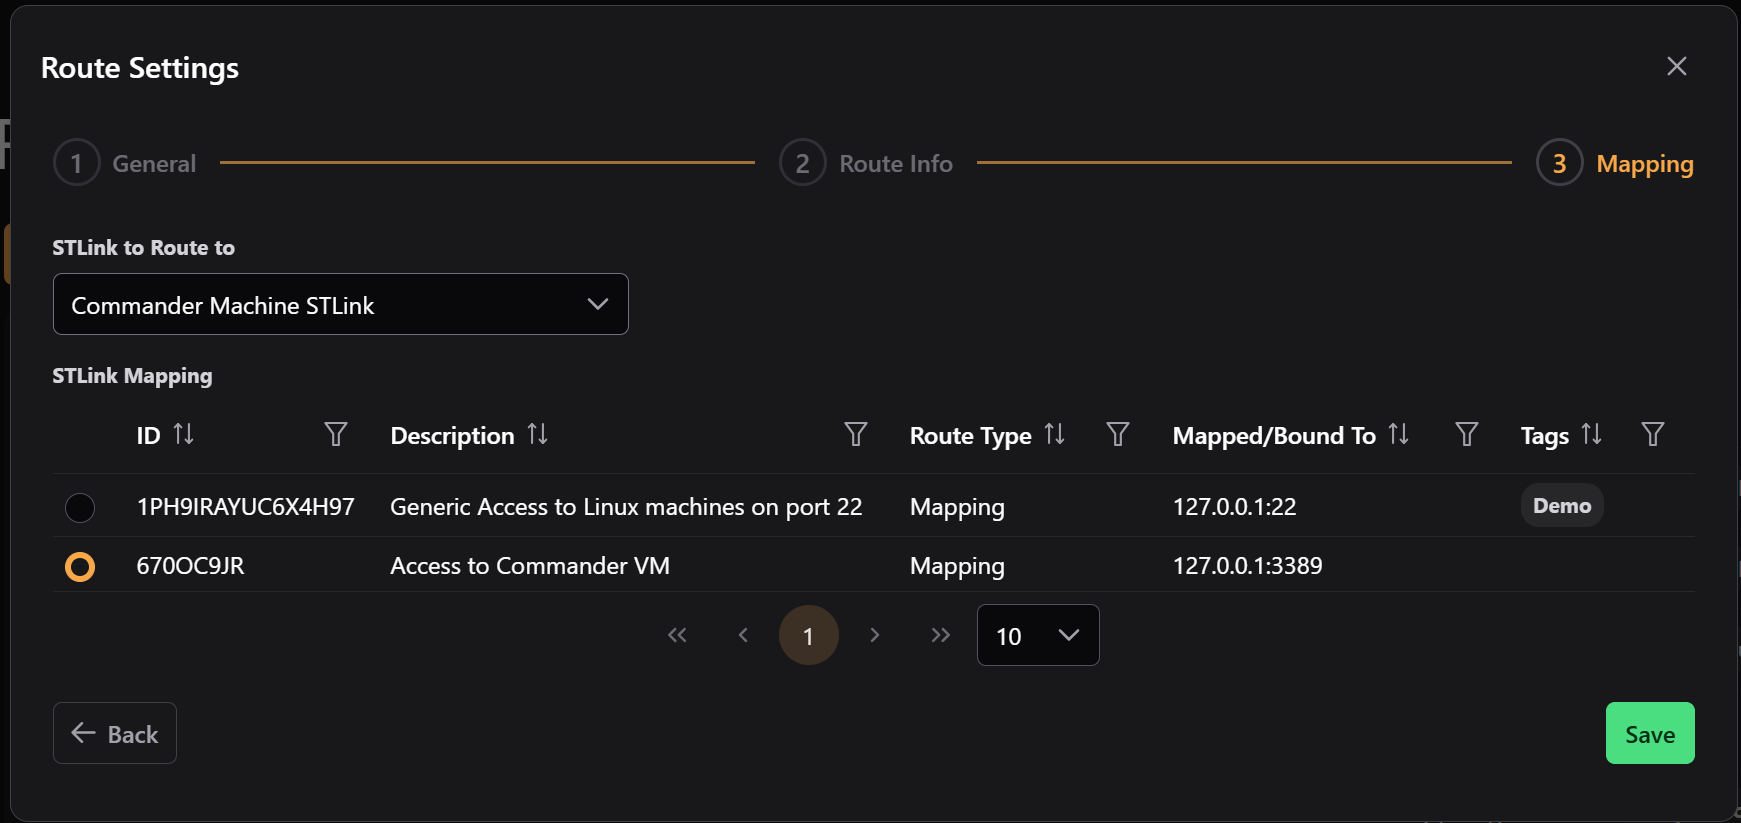
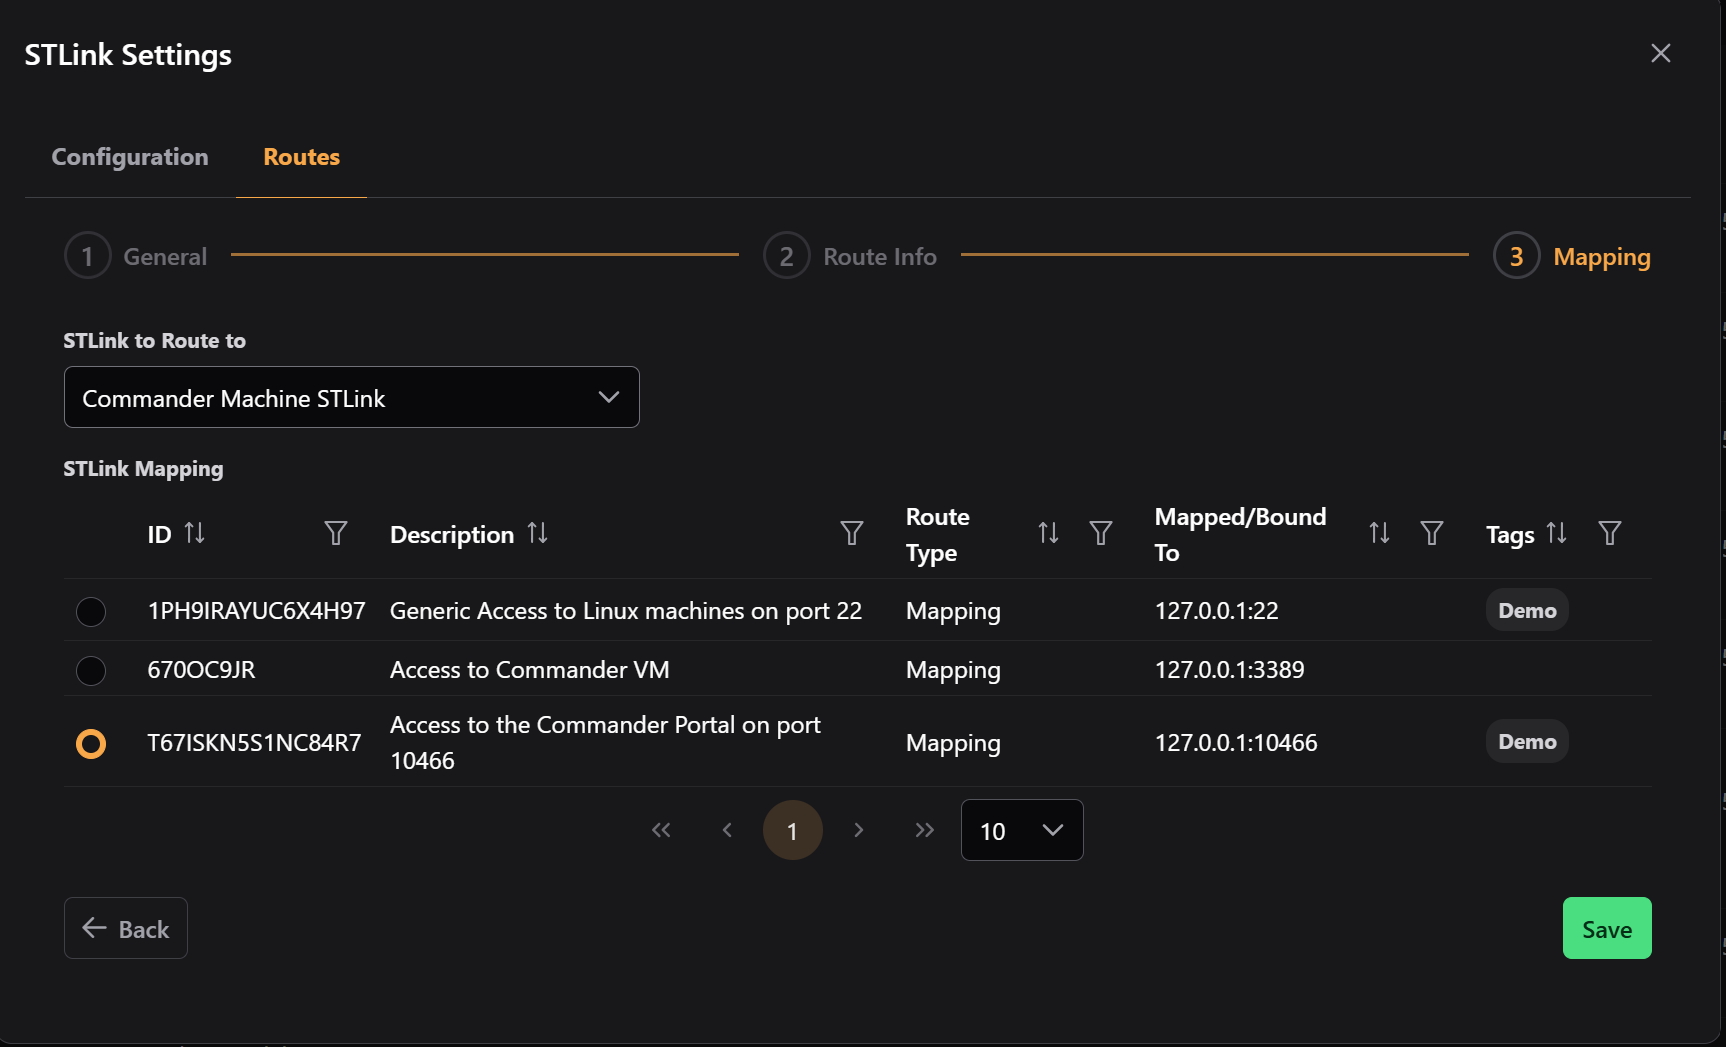
- In the Mapping STLink step, select the
Commander Machine STLinkin the STLink to Route to dropdown. - In the STLink Mapping table, select the
Access to the Commander Portal on port 10466Mapping Route. - Click the green Save button in the bottom right of the modal.
Deploy the Client STLink
It's time to deploy the STLink onto a client machine. This must be a machine that is not your Commander, such as your laptop or a different VM.
Follow the steps in the Setting Up A Profile to create a profile for your client STLink, assigning the RDP/SSH Binding Route you just created to this new Profile.
Follow the instructions to deploy the STLink using the client Profile in the STLink Getting Started section.
After your client STLink is deployed, proceed to the STLink Management section to add the routes you created above to your Commander and Client STLinks.