

Setting up a Profile
Profiles give you the ability to preconfigure STLinks so that they are ready to route and receive connections immediately upon activation.
Since the only way to deploy STLinks is through Profiles, we'll set one up now.
Let's create a profile that we'll use to deploy the STLink onto the Commander's machine.
Create a Commander STLink Profile
To create this initial Profile for the Commander's STLink:
- Sign in to the Commander Portal with your Administrator credentials that you just set.
- Navigate to the Profiles tab in the left navigation bar.
- Click the orange + New Profile button in the top left of the Profiles View.
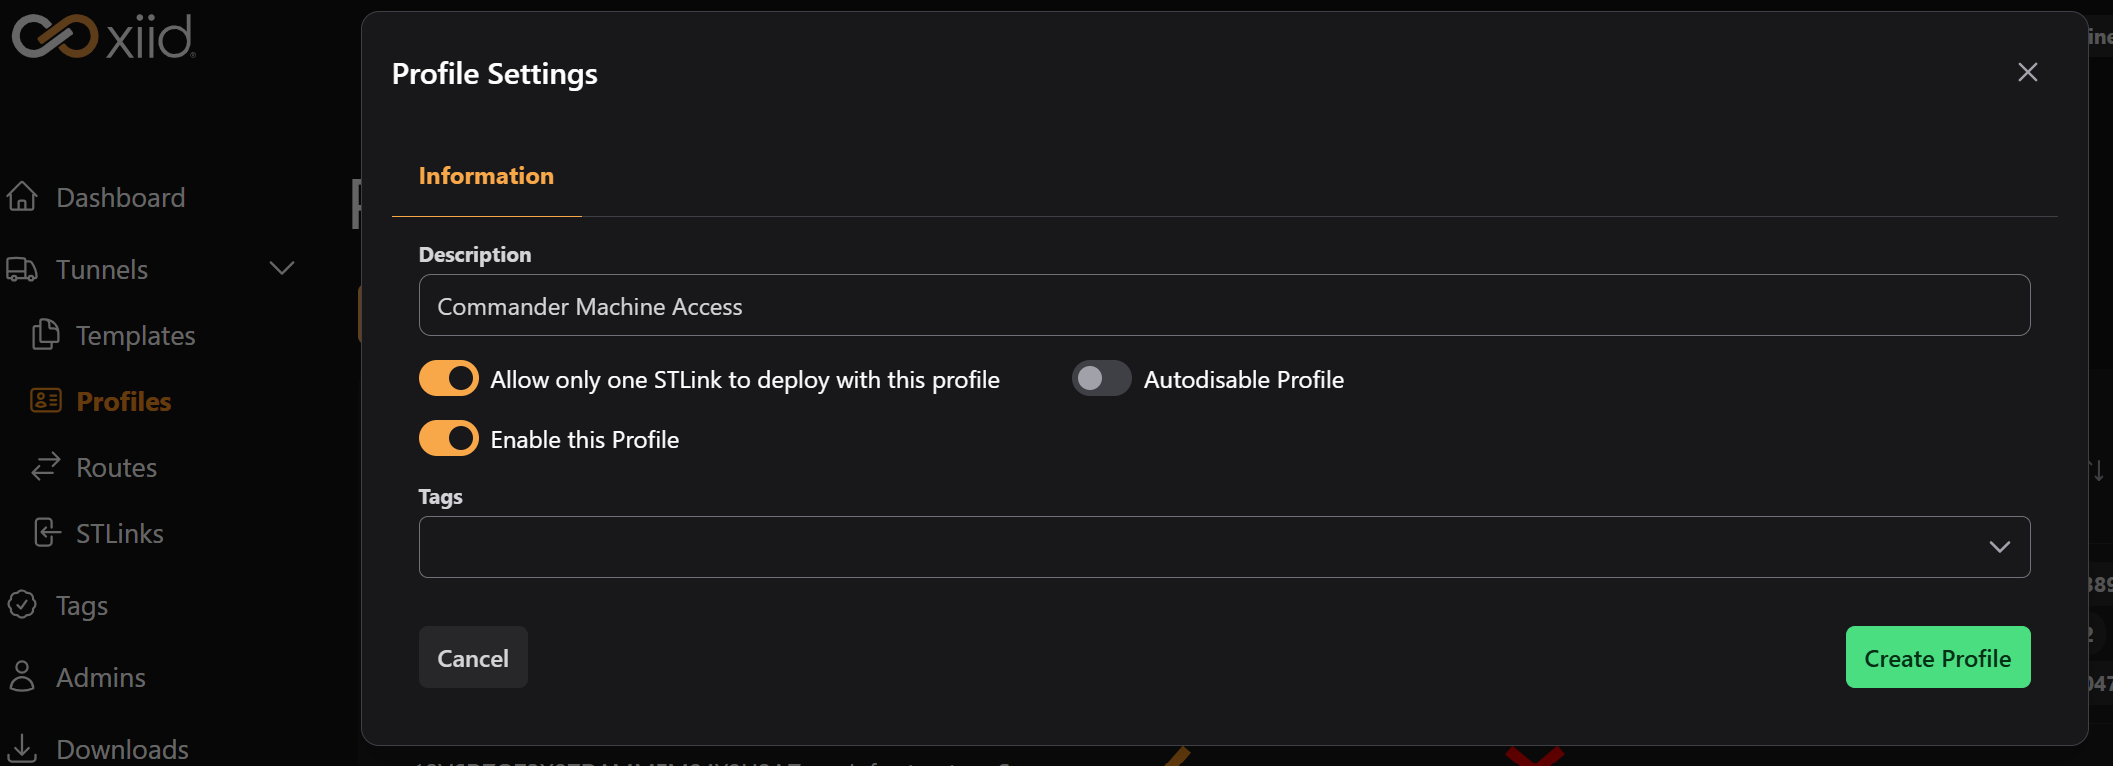
- In the Profile Settings Modal, enter
Commander Machine Accessin the Description field. - Click the Allow only one STLink to deploy with this profile switch to ensure that this profile can only be used once for the Commander's machine, and not again.
- Click the Enable this Profile switch so that the Profile can be used for the Commander's STLink deployment.
- (Optional) You may set a date and time to Auto-disable the Profile if you haven't used it to deploy the STLink.
- (Optional) You may assign any Tags to the Profile.
- Click the green Create Profile button in the bottom right.
You will see your new Profile populate in the table in the Profiles View.
Next, we'll click this newly-create Profile so we can add some Routes to it.
Adding a Mapping Route
TIP
Since Routes can be assigned to any number of Profiles, Templates, and STLinks, re-use Routes as much as possible.
If you deployed your Commander on a Windows operating system, we will configure an RDP Mapping Route. For Linux operating systems, we'll configure an SSH Mapping Route.
After installing and activating an STLink with a Profile, Routes that were assigned to a Profile will be active immediately.
Thus, after we install the STLink on your Commander, these pre-configured Routes that we create will be active.
First, let's add the remote access Mapping Route to your newly-created Profile:
- Sign in to the Commander Portal with your Administrator credentials.
- Navigate to the Profiles tab.
- Find the Commander Profile we created in the last section and click on its row in the table.
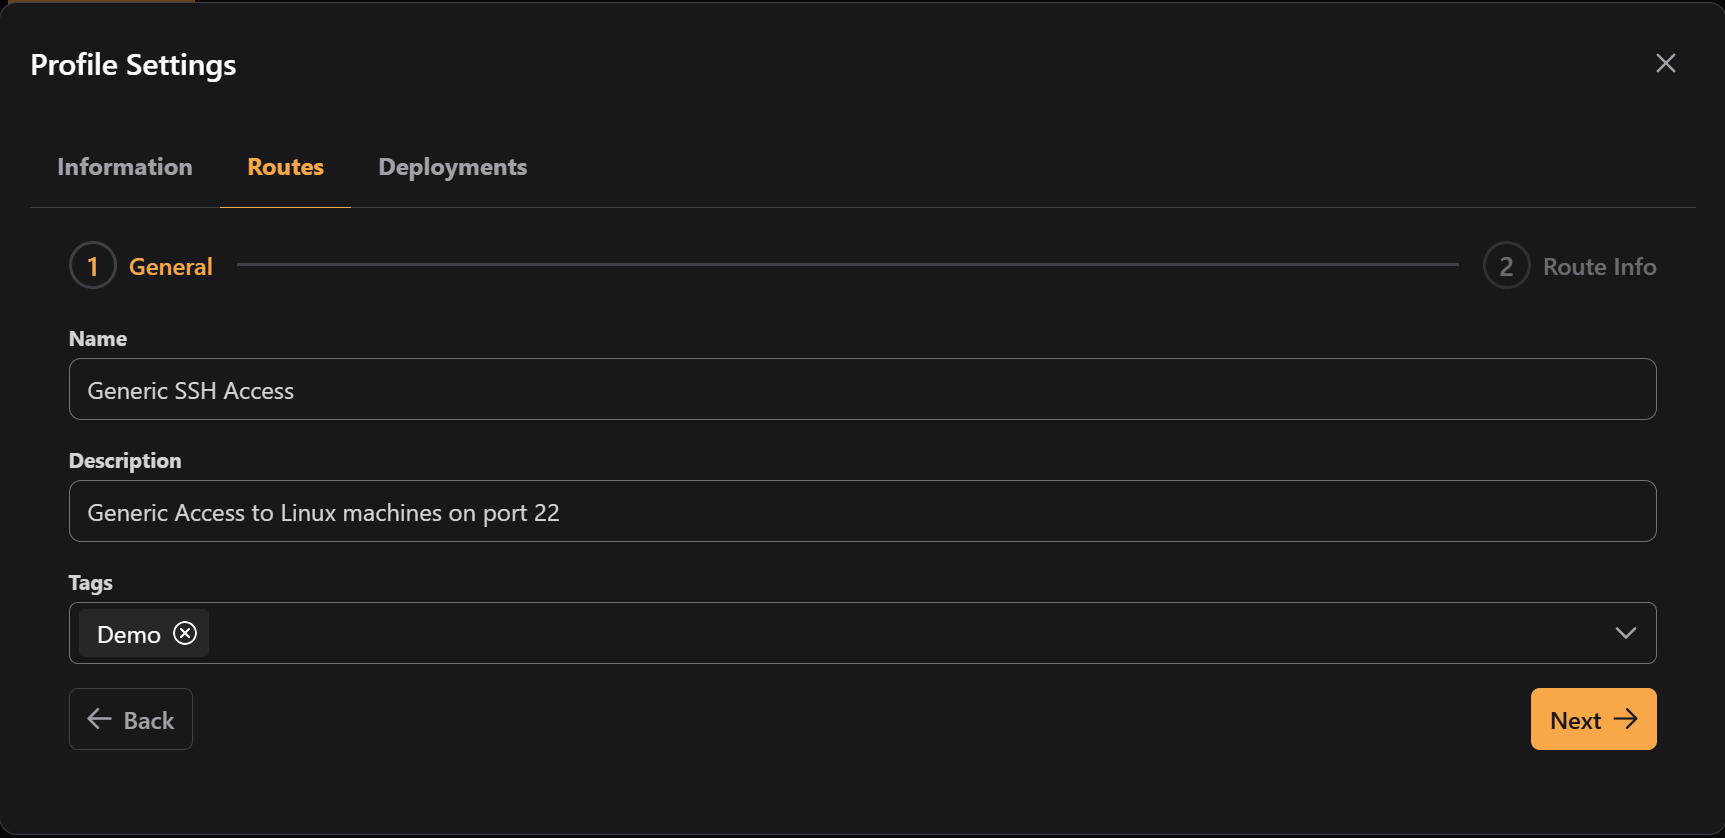
- In the modal that appears, click the Routes tab.
- Click the orange Add Route dropdown button and click New Route.
- In the New Routes wizard, enter the following Name:
Generic RDP AccessGeneric SSH Access- In the Description field, enter the following:
Generic Access to Windows machines on port 3389Generic Access to Linux machines on port 22- (Optional) Enter any Tags for the Route that you would like to associate with this Mapping Route
- Click the orange Next button.
- In the Routing step of the wizard, click the Route Type dropdown and select Mapping (Exit).
- Leave the Protocol Type as TCP.
- In the Map To IP:Port field, enter:
127.0.0.1:3389127.0.0.1:22- Click the green Save button in the bottom right.
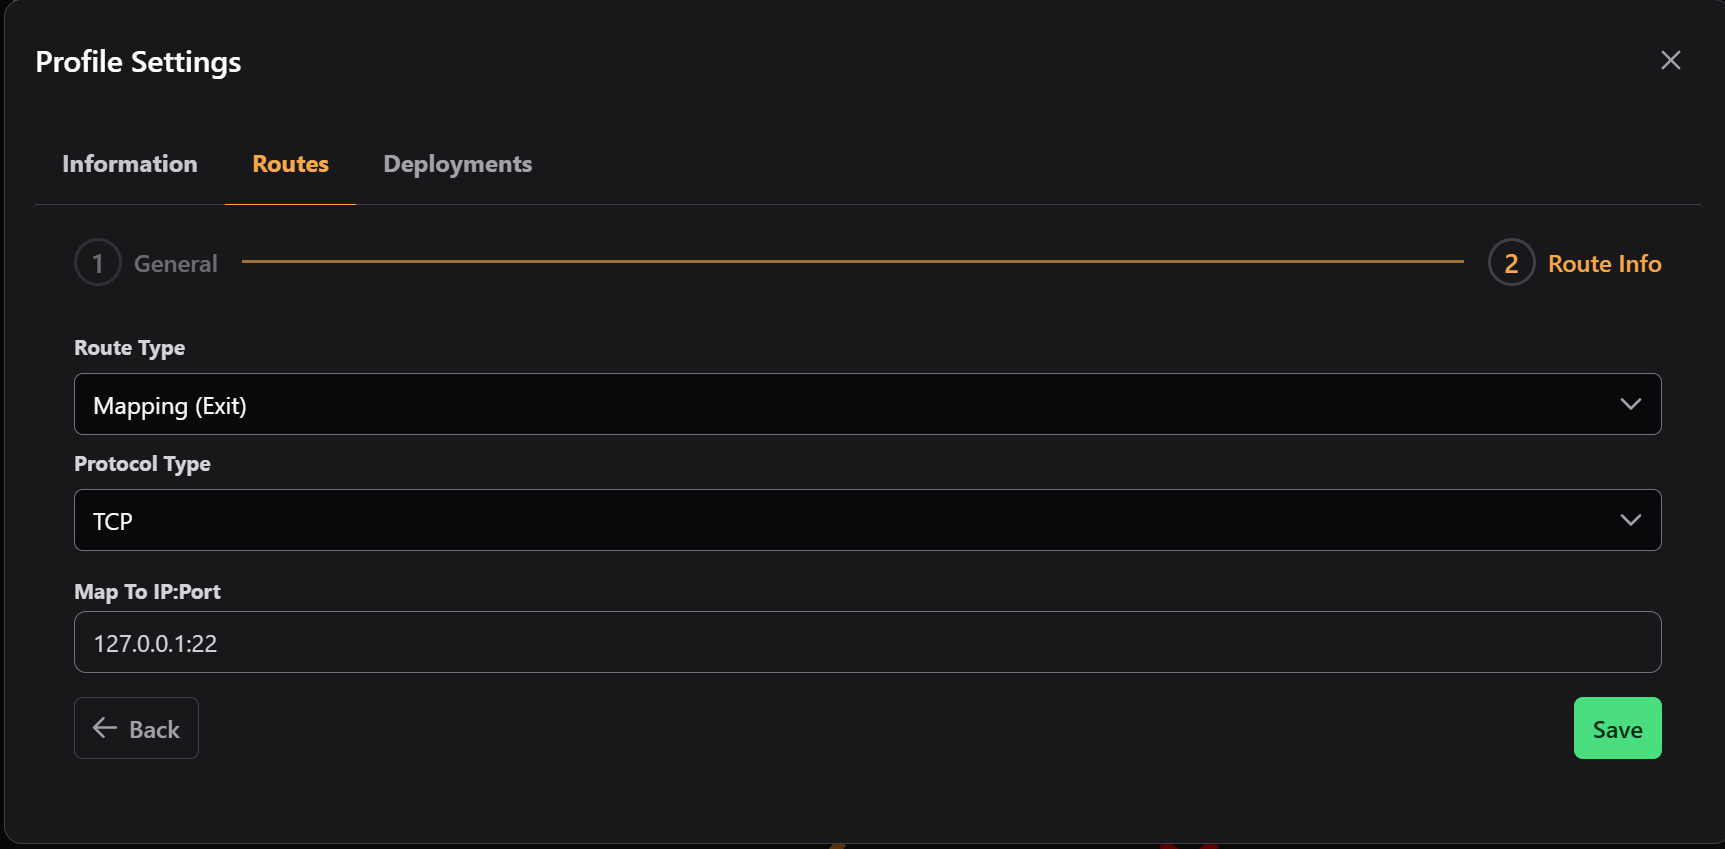
You will now see that your first Mapping Route is assigned to your Commander Profile as well as viewable in the Routes tab.
Deploy the STLink
Now that we have assigned a Mapping Route to the Profile, we're ready to deploy the Commander's STLink using our new Profile.
The actual deployment process for the STLink is covered in the STLink Getting Started section.
- Sign in to the Commander Portal with your Administrator credentials.
- Navigate to the Profiles tab.
- Find the Commander Profile we created in the last section and click on the row in the table.
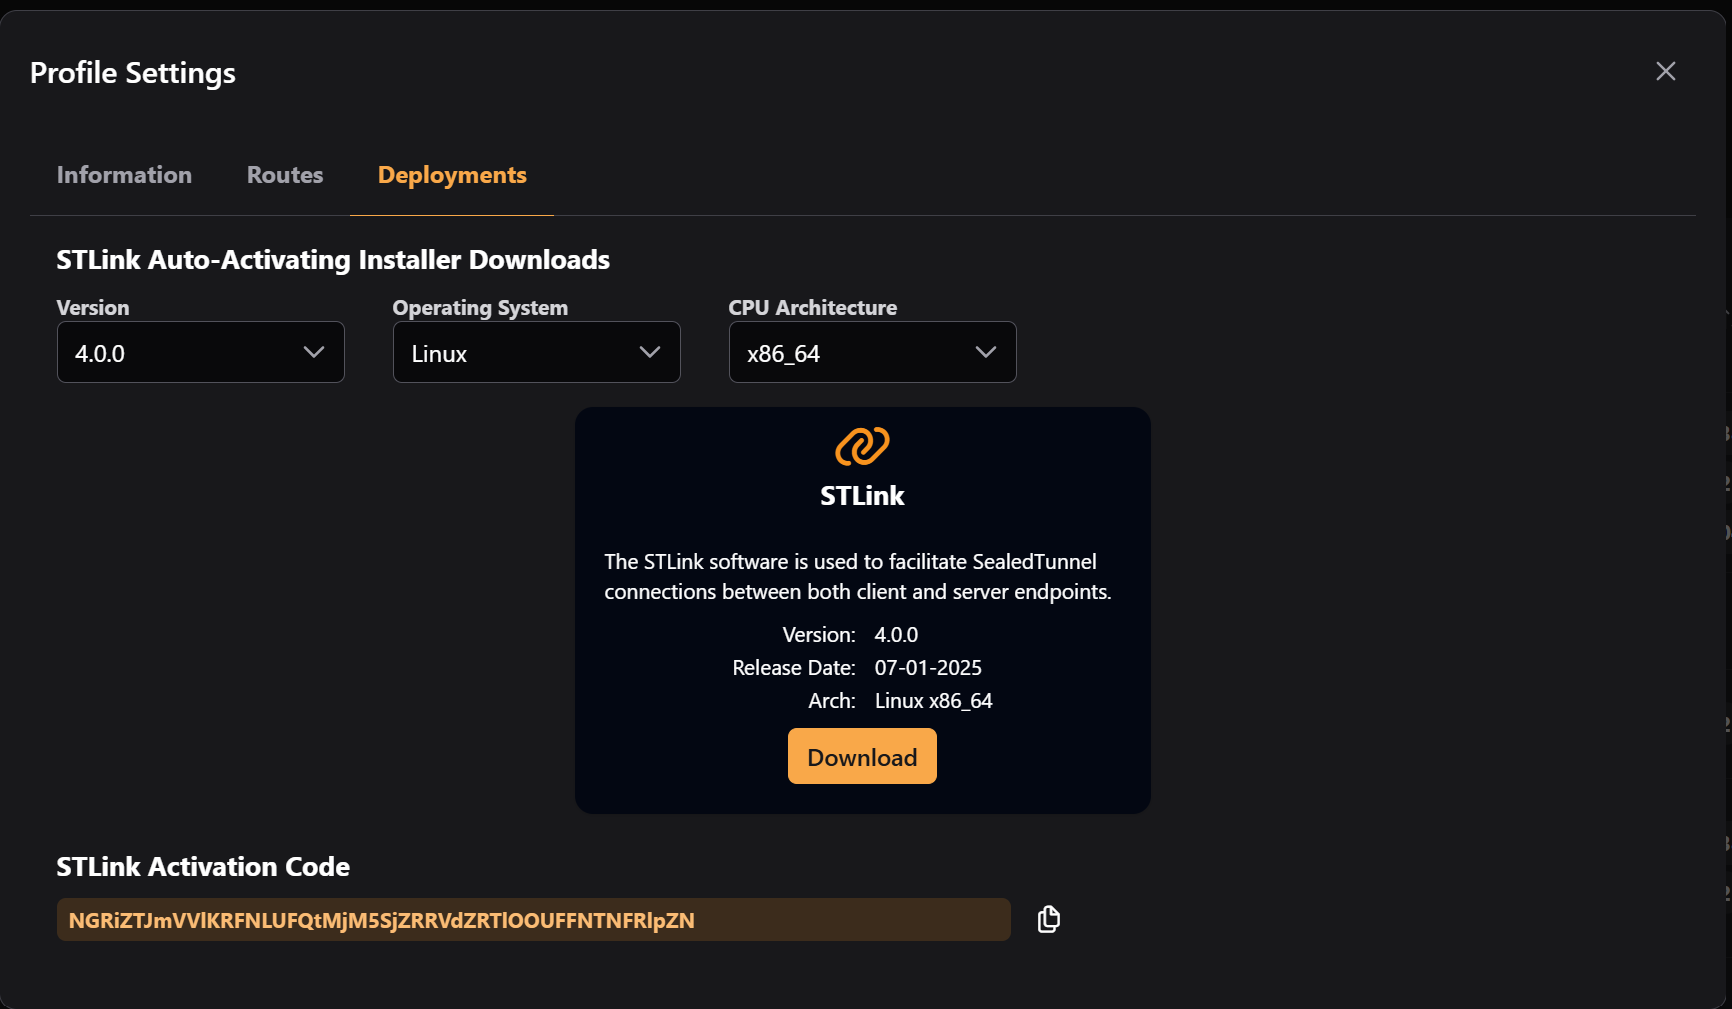
- In the modal that appears, click the Deployments tab.
- From the Deployments tab, there are two ways you can deploy an STLink:
- Using the Auto-Activation Installer by selecting the operating system and CPU architecture and version from the dropdowns and clicking the orange Download button in the card.
- By downloading the Base Installer and using the Activation Code shown at the bottom of the modal.
- Follow the steps in the STLink Getting Started guide to deploy the STLink onto your Commander's machine.
After deploying the Commander's STLink, return here and continue to the Routes Setup section.