

Deploying and Accessing Cloud Virtual Machines (VMs) with SealedTunnel
Overview
Cloud Virtual Machine (VM) instances can be securely accessed via the SealedTunnel, eliminating the need for public IP addresses or open inbound ports.
This guide will walk you through how to deploy cloud VMs with pre-installed STLink software.
Prerequisites
You must have:
- Xiid Terniion's SealedTunnel product available in your environment
- A client machine that you wish to access the VM from
- A valid account for one of the following:
- Amazon Web Services (AWS)
- Google Cloud Platform (GCP)
- Microsoft Azure
Profile Setup
First you must set up a Profile to use when deploying the STLink. The Profile will contain the Mapping Route to allow immediate access to the cloud VM without the need for any inbound firewall rules or public IP addresses.
- Sign in to the Commander Portal and navigate to the Profiles View.
- Click the orange + New Profile button in the top left.
- In the Description field enter
Cloud VM Profile. - (Optional): We highly recommend you click the Allow only one STLink to deploy with this profile switch.
- Click the Enable this Profile switch.
- (Optional): Add any Tags you would like to the profile
- Click the green Create Profile button in the bottom right
Create the Mapping Route for the Profile:
- Select the Profile you created in the previous section
- Click on the Routes tab in the modal
- Click the orange Add Route button and select New Route
- In the Name field, enter
RDP Accessfor Windows andSSH Accessfor macOS and Linux - In the Description field, enter
Generic VM Access - (Optional): Add any Tags you would like to add to the Route
- Click the orange Next button in the bottom right
- On the next step, select Mapping (Exit) for the Map Type
- Select TCP for the protocol
- In the Map To IP:Port field, enter
127.0.0.1:3389for Windows and127.0.0.1:22for Linux and macOS - Click the green Save button in the bottom right of the modal
Your profile is now ready to use on your cloud virtual machine.
Deploy the Cloud VM
To deploy the STLink on the cloud VM, you must first acquire a download link for the STLink and the filename for the STLink installer. Follow these steps to get the download link and filename from the Commander Portal.
- Navigate to the Profiles View and click the Profile you created above
- Click the Deployments tab in the top of the modal
- Select the Operating System and Architecture of your cloud virtual machine
- Ensure that you are downloading the most recent version of the STLink software in the Version dropdown
- Click the array to the right of the gray Download button and click Copy Link.
- This is your download link. Save it elsewhere for use in the deployment steps below.
- The name after the last
/in the download link is the filename you'll need to use - Example:
- Download link:
https://download.xiid.com/download/stlink_4.0.0_windows_amd64_ZjAxZmJiVVlKRFNLUFQtMThWNkRaUTczWDhaASDFGUVNOTRZOUgyQVpAcDAwLnhpaWQuY29t.exe
- Filename:
stlink_4.0.0_windows_amd64_ZjAxZmJiVVlKRFNLUFQtMThWNkRaUTczWDhaASDFGUVNOTRZOUgyQVpAcDAwLnhpaWQuY29t.exe
- Download link:
AWS EC2 Deployment
TIP
You should disable auto-IP assignment from the subnet as you don't need a public IP address assigned to the instance.
Now that your Profile is set up, you can deploy your EC2 instance.
- At the bottom of the EC2 Launch page, click the dropdown for
Advanced details. - Locate the
User datasection (shown below):
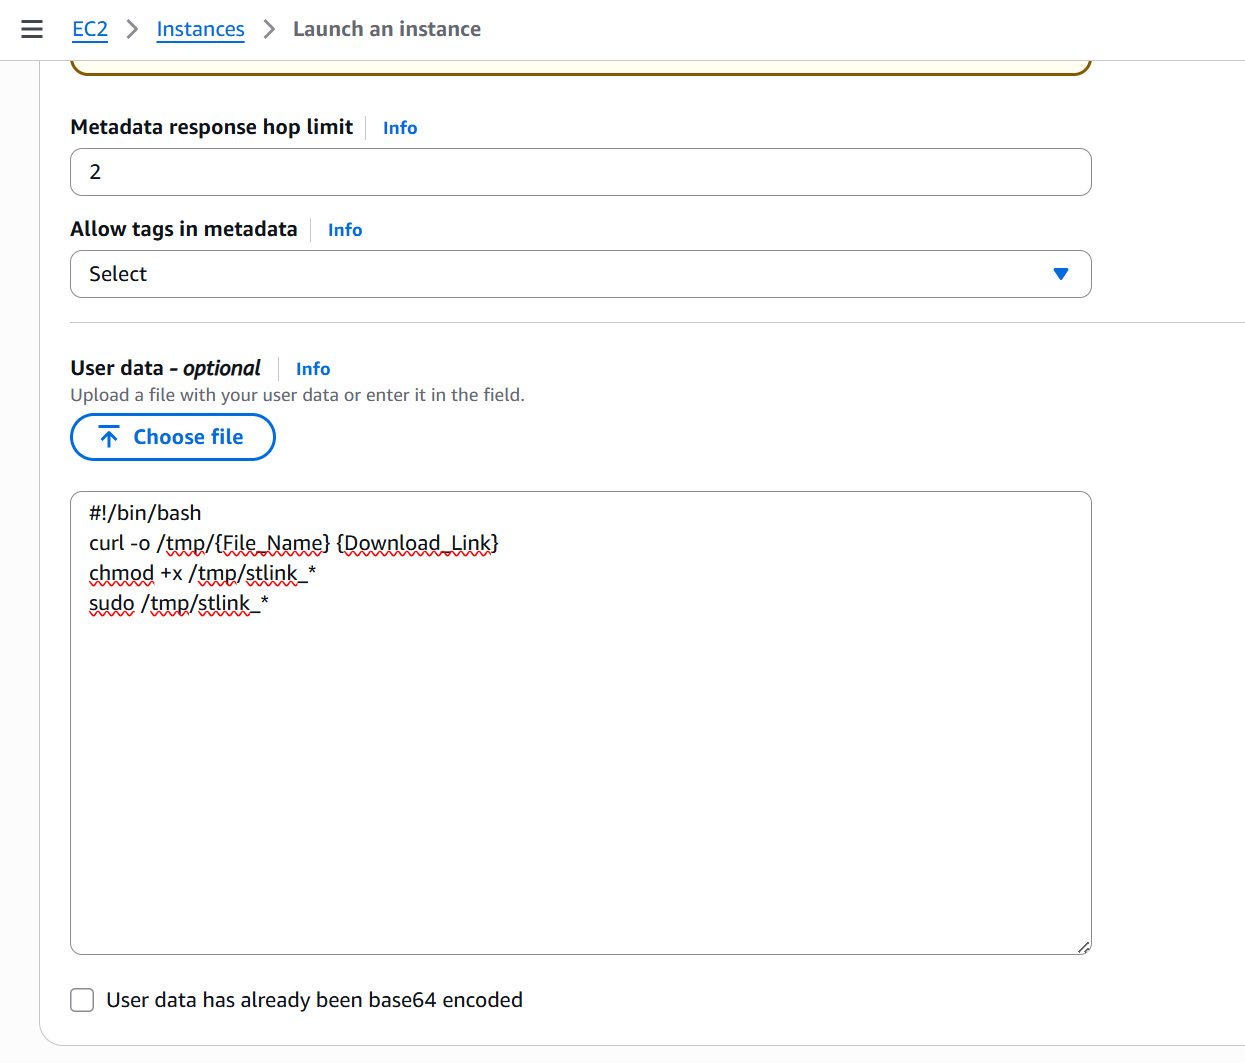
Paste the script below into User data, replacing {Download_Link} and {File_Name} with the download link and filename acquired above.
<script>
curl -L "{Download_Link}" -o %APPDATA%\{File_Name}
%APPDATA%\{File_Name}
</script>#!/bin/bash
curl -o /tmp/{File_Name} {Download_Link}
chmod +x /tmp/stlink_*
sudo /tmp/stlink_*#!/bin/bash
curl -o /tmp/{File_Name} {Download_Link}
chmod +x /tmp/stlink_*
sudo /tmp/stlink_*- After reviewing the information, launch your EC2 instance and return to the EC2 screen that lists your launched instances.
- Wait for the Status Check column to show 2/2 checks passed (or in some cases 3/3 checks passed) in green text before proceeding.
You now have a deployed EC2 instance with the Xiid STLink software pre-installed and activated with a Mapping available for access.
GCP VM Deployment
TIP
In the Networking section while creating a VM, you can deselect all firewall rules and port forwarding.
Now that your Profile is set up, you can deploy your GCP Virtual Machine.
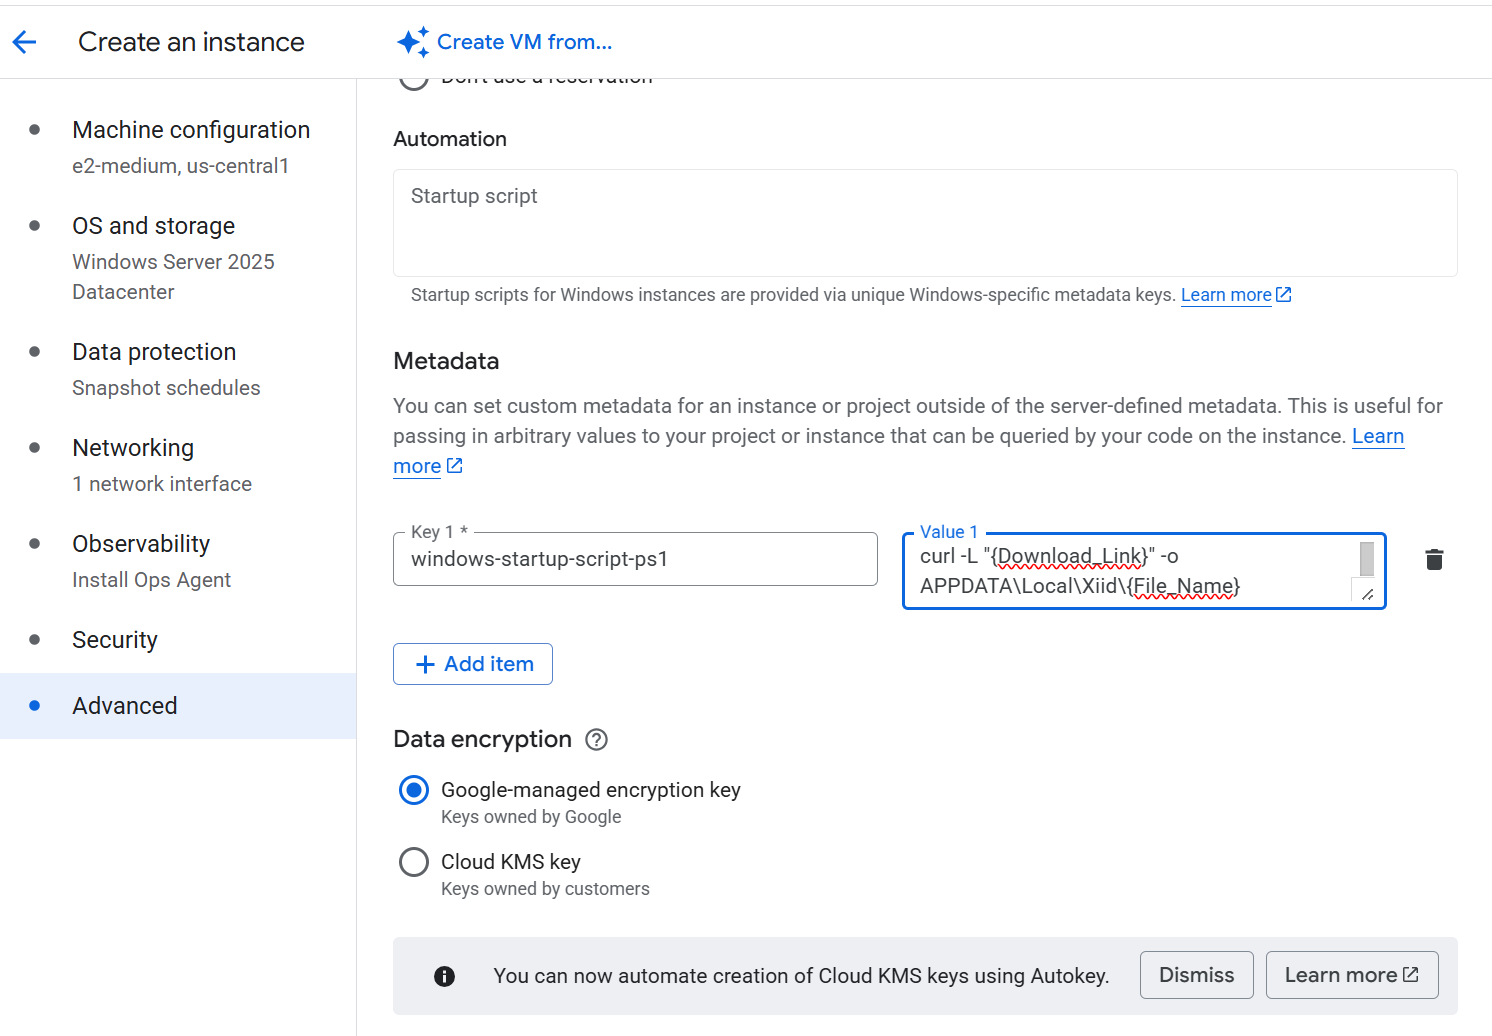
In the Create an Instance page, select the Advanced section on the left navigation.
For Linux Virtual Machines, paste the script shown below into the Startup Script section under Automation.

Replace {Download_Link} and {File_Name} in the scripts with the download link and filename captured above.
curl "{Download_Link}" -o C:\Windows\temp\{File_Name}
C:\Windows\temp\{File_Name}#! /bin/bash
curl -o /tmp/{File_Name} {Download_Link}
chmod +x /tmp/stlink_*
sudo /tmp/stlink_*
EOFFor Windows Virtual Machines, add a key under the Metadata section. The key should be called windows-startup-script-ps1. The value associated with the script is the powershell script provided above.
- After reviewing the information, launch your GCP VM.
- Wait for the Status column show a green checkmark
You now have a deployed GCP VM with the Xiid STLink software pre-installed and activated with a Mapping available for access.
Azure VM Deployment
TIP
In the Networking section while creating a new virtual machine, you can select Basic for the NIC network security group and None under Public inbound ports.
Now that your Profile is set up, you can deploy your Azure Virtual Machine.
In the Create a virtual machine page, select the Advanced section on the top navigation.
In the Custom Data field, enter the script below based on the operating system of the virtual machine you are deploying.
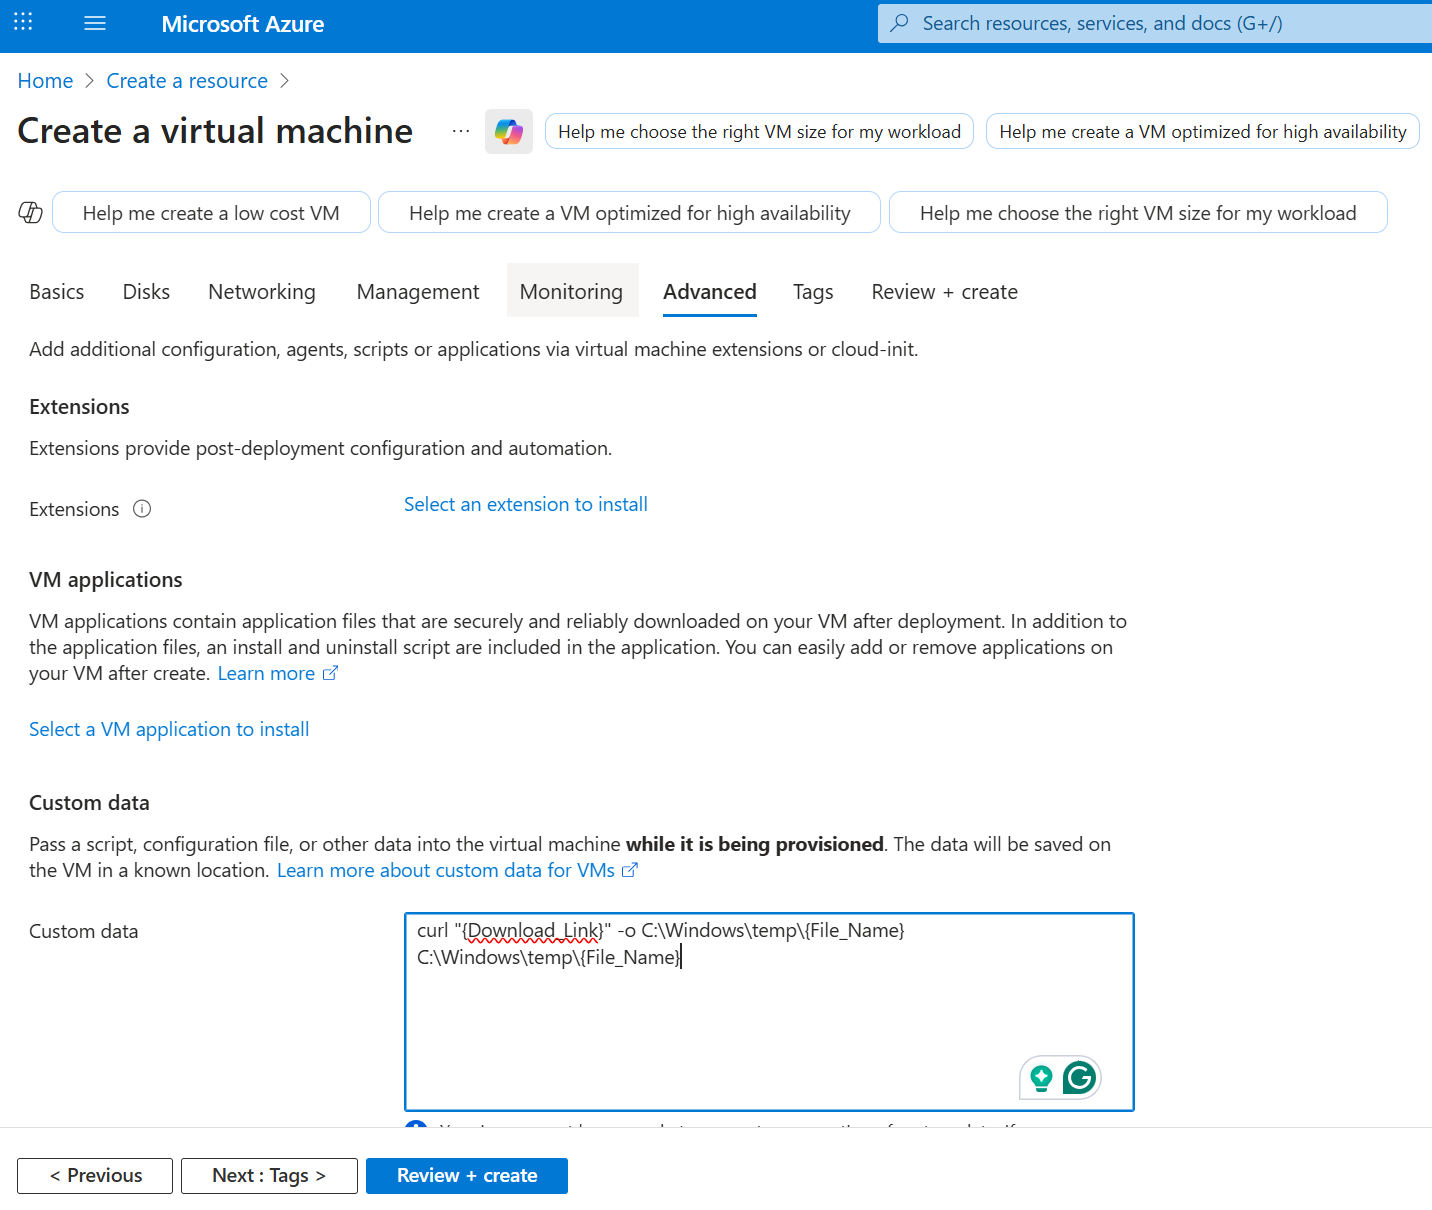
Replace {Download_Link} and {File_Name} in the scripts with the download link and filename captured above.
curl "{Download_Link}" -o C:\Windows\temp\{File_Name}
C:\Windows\temp\{File_Name}#! /bin/bash
curl -o /tmp/{File_Name} {Download_Link}
chmod +x /tmp/stlink_*
sudo /tmp/stlink_*- After reviewing the information, create your Azure VM.
- Wait for the green notification indicating that the VM has been successfully deployed.
You now have a deployed Azure VM with the Xiid STLink software pre-installed and activated with a Mapping available for access.
Add Binding Route Access
Finally, set up access from a client machine to the virtual machine.
If you have not deployed an STLink on a client machine to access the virtual machine, you can follow the instructions under the STLink Deployment to deploy a client-side STLink.
- Sign in to your Commander Portal.
- Find the client-side STLink in the STLinks table under the STLinks View and click on it.
- Click on the Routes tab in the STLink modal
- Click the orange Add Route dropdown button and click New Route.
- In the General step, enter
Cloud VM Accessin the name - Enter
VM Access using {protocol}in the Description field- Replace
{protocol}with the access protocol (SSH or RDP) used for the VM.
- Replace
- Assign any tags to the Route that you would like
- Click the orange Next button
- In the Route Info step, select Binding (Entry) for the Route Type.
- Select TCP for the Protocol
- In the Bind To IP:Port field, enter a loopback address and port for the client to use to access the VM
i.e. 127.1.1.1:1022(SSH)i.e. 127.1.1.1:13389(RDP)
- In the Helper Text field, enter the URI connection string for the VM
e.g. ssh://user@127.1.1.1:1022e.g. rdp://user@127.1.1.1:13389
- Click the orange Next button
- In the Mapping step, select the VM's STLink deployed in the previous step
- In the STLink Mapping table, select the SSH or RDP mapping set up in the previous step
- Click the green Save button
You can now access the cloud VM via an RDP connection on 127.1.1.1:13389 or SSH connection on 127.1.1.1:1022 from the client STLink.