SAML2.0 Application Setup
Many applications support the use of SAML2.0 Authentication with an SSO Portal. For these external applications, you can use the SAML2.0 Xiid Application to integrate into any of the SSO Portals you have created on your Xiid.IM Agent. Follow the steps below to integrate any pure SAML2.0 supported applications into your SSO Portals.
Xiid.IM SAML2.0 Application Configuration
Start by signing in to the Xiid Agent Management Portal and navigating to the Applications tab.
On the Applications screen, click the purple Choose button in the SAML2.0 card.
On the Applications List for SAML2 screen, click the purple + Add Application button in the top right.
In the Portal dropdown, select the SSO Portal you would like enable access to this external application.
Provide a Description for the application and then click the purple Next button.
In the Parameters section, provide the Domain associated to the external application. If you do not have a domain associated with the external application, use the domain name associated with your user login.
For the Access Point field, enter the initial entry point for the Identity Provider Initiated SAML request. The Access Point will be defined by the Service Provider and will vary by SPs, however it is often described as the Service Provider Login URL.
Note: The Access Point is not the Assertion Consumer Service (or ACS). The ACS is used later in the SAML authentication flow and must be provided in the SAML payloads by the Service Provider.
After reviewing the information, click the purple Save button to finish setting up the SAML2 Application Configurations for the Xiid.IM Agent.
Service Provider Setup
The Service Provider Setup will vary by each SP. In a general sense, you need to enable SSO Authentication from the Administrator portal for your third-party Application.
After SSO Sign-In has been enabled, you will need to provide the SSO and SLS URLs to the Service Provider so that the SP knows where to route login requests, handle the sign-in redirects, and handle logout from the application.
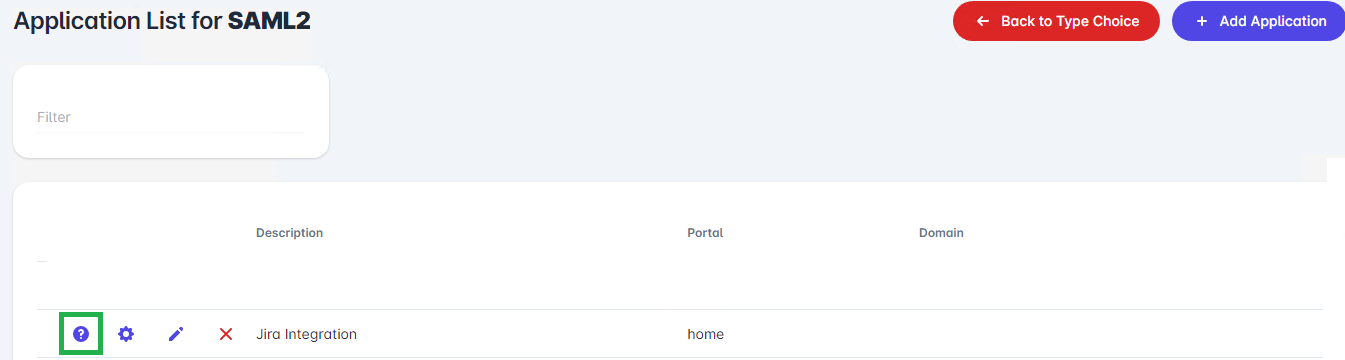
To acquire the SSO and SLS URLs, navigate to the Applications List for SAML2 screen in the Xiid Agent Management Portal, find your SAML2 Application in the table, and click the purple Question Mark (?) button on the left side of the row. (Shown below in green)
After clicking the Question Mark button, you will be taken to the Help for SAML2 Application screen, which will display your SSO and SLS URLs.
Use the purple Copy buttons to copy the SSO and SLS URLs into their respective fields into your Service Provider SSO Configurations.
Note: Each SAML2 Application generates its own SSO, SLS and public certificate. Do not attempt to re-use the same URLs or certificates across Xiid Applications or they will not work.
After copying the SSO and SLS URLs into the SAML Metadata Configuration for the Service Provider, the last step is to copy the public certificate from the Xiid.IM Agent over to the Service Provider.
Click the purple Next button from the SSO/SLS screen, and then click the purple Download Certificate button.
A .pem file will be downloaded to your machine. Depending on the Service Provider, you will either need to upload the whole PEM file or copy the contents of the certificate and paste it into the field in your Service Provider’s configuration portal.
After the SAML Trust Relationship has been established between the Service Provider and the Identity Provider, your SAML Application will be available in the designated SSO Portal for use.