Xiid.IM Agent Configuration
Now that we have the Xiid Agent securely running on our domain controller, we’re ready to configure the details of the Agent.
Authenticator Setup
The first step is to set up an Authenticator, which will instruct the Agent on how to communicate with your LDAP directory.
Start by opening the Xiid Agent Management Portal by clicking the Browser Icon labeled Manage Xiid.IM Agent on your desktop.
In the Xiid Agent Management Portal, navigate to the Authenticators tab.
Click the purple Add Authenticator button in the top right.
Enter a description of the Authenticator that will help you associate the authenticator to your LDAP Service and it’s corresponding user groups, domain mapping and Active Directory Authentication Agent.
In the Connector section, provide a description of the Connector. The Connector is what defines the communication parameters to your LDAP service.
In the Type dropdown window, select ldap.
For the Server URL field, enter the IP Address of the LDAP service. You may use the Loopback Address if the LDAP Directory Service is running on the same machine as the Active Directory Agent.
For the Username and Password fields, enter the credentials of an LDAP user that has access only to query the LDAP directory. No other permissions are needed nor recommended on this service user.
The Username must be the fully qualified User Principle Name.
Incorrect Username:
user
Correct Username:
user@example.com
Hit the purple Save button and a window will pop up asking for the external domain name that you would like to map to the internal domain name. You can choose the same name as the internal if no domain name mappings are necessary.
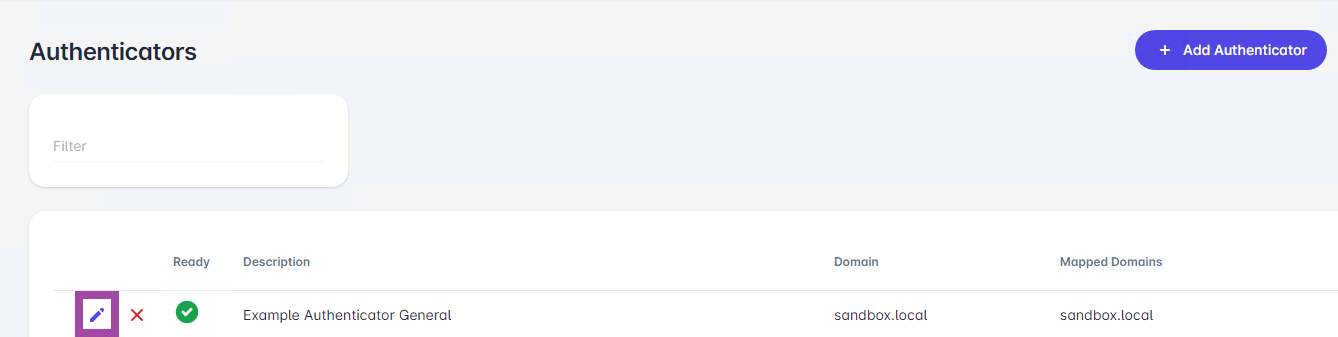
In the Authenticators table, you should now see a row for your newly created Authenticator.
Next, you can configure the Security Groups that will be queried with this Authenticator.
Note: Only user-defined Security Groups can be used. The Windows-defined Security Groups created by default in Active Directory cannot be used.
The first thing you will need to do is enable Advanced Mode by click the switch next to Advanced Mode in the top right corner.
Click the Pencil Button on the left side of the new row of your Authenticator to edit the settings for your Authenticator. (shown below in purple)
With Advanced Mode enabled, you will see two additional fields in the Authenticator section labeled Group Include and Group Exclude.
You can populate either of those fields with as many Security Groups as you would like included for the Authenticator (using the Group Include field) or specify any number of Security Groups you would like to exclude from this Authenticator using the Group Exclude field.
Separate multiple Security Groups with using a comma (”,”).
Note: Windows default Security Groups are NOT considered in the Group Include/Exclude filters. It must be a user-defined Security Group.
Firewalls
[OPTIONAL]
Firewalls offer an additional layer of Application Security to filter unwanted IP addresses or restrict subnet access to your SSO portals.
If your Agent Management Portal does not show a Firewall tab in the left hand navigation menu, follow this faq for help on enabling advanced mode.
Navigate to the Firewalls tab and click the purple Add Firewall button in the top right.
On the Add Firewall screen, provide a description for the firewall that reminds you of the firewall rule this policy enacts.
For the Block Type dropdown, select whether you wish to block all requests or approve all requests from a given IP address.
In the IP Address field, enter the IP Address you wish to allow or block.
Last, enter any comma-separated Tags you would like to use to differentiate this Firewall.
Tags can be used to create groups of firewalls, so if you have a “corporate” firewall rule that encompasses multiple IP White/Blacklists, you can group them all under a single tag to include in your SSO Portals.
Click the purple Save button to wrap up creating your Firewall.
Translator Setup
[OPTIONAL]
We’ve now defined how to communicate with our LDAP service, however there may be a problem with our external applications. Some of them may ask for an email address to sign in as opposed to your domain credentials.
We can solve this problem seamlessly using Xiid Translators.
Sign in to the Xiid Agent Management Portal and navigate to the Translators tab.
On the Translators screen, click the purple Add Translator button in the top right.
Enter a Description for the translator that helps you understand what data is being translated to and from the local domain context.
In the Translator Type dropdown, select:
Domain to translate an external domain name, such as example.com for an email address, to an internal domain name, such as example.local
Name to translate a username, such as BillNye to another username, such as NeildeGrasseTyson
UPN to translate a fully qualified username, such as BillNye@example.com to NeildeGrasseTyson@example.local
In the Translate From field, enter the Name, UPN, or Domain Name to translate authentication requests from (inbound requests, generally from the SSO Portal).
In the Translate To field, enter the Name or UPN to translate to when sending the authentication request to the LDAP service.
Note: The Domain type does not have a Translate To field because the domain name is implied from the Connector in the Authenticator.
Last, you can enter any Tags you would like to use to group this Translator with other Translators.
Click the purple Save button to finish creating your Translator.
XOTC Component Setup
[OPTIONAL]
Start by signing into the Xiid Agent Management Portal and navigate to the XOTC tab.
Click the purple Add XOTC button in the top right.
Provide a description for the XOTC that helps you associate which user groups and rules this authentication standard will enforce.
Last, choose a duration of time with which the One-Time-Code will be valid for. Xiid generally recommends a 1-minute interval to give users a bit of breathing room while signing in.
Click the purple Save button to finish.
Now that we have our XOTC Authentication mechanism set up, we need to enforce the XOTC Authentication on SSO Portals.
Navigate to the SSO Portals tab and click the purple pencil icon to edit the SSO Portal.
Click Next until you arrive at the XOTC / MFA section.
On the XOTC / MFA screen you should now see the new authentication mechanism listed in the table.
Select the XOTC component and click Next until you reach the end and save the changes.
Now your SSO Portal will enforce XOTC Authentication for all of your users!
SSO Portal Setup
[OPTIONAL]
Xiid provides the ability to set up multiple SSO Portals for different user groups. If you have an IT organization or an Engineering organization that may need access to special applications or resources, you can separate access using different SSO Portals.
To start, sign into the Xiid Agent Management Portal and navigate to the SSO Portals tab.
Xiid creates a default home portal when your first Authenticator is created. You can edit that SSO Portal (though you cannot change the id) by clicking the purple pencil button next to the SSO Portal row in the SSO Portals Table.
To create a new SSO Portal, start by clicking the purple Add SSO Portal button in the top right corner.
On the Add SSO Portal screen, start by providing an ID for the Portal. The ID will define the full URL path of the SSO Portal. For instance, the default SSO Portal created by Xiid for you has the ID of home, so when you navigate to the SSO Portal, you will see a URL path similar to: https://exampleportal.us.xiid.im/home which has the word home in the URL. If you used engineering as the ID, your new SSO Portal URL would be: https://exampleportal.us.xiid.im/engineering
After providing an ID for the Portal, enter a Description that helps you understand the purpose of this SSO Portal in conjunction with the users it will serve.
Click the Next button and select the Authenticator you would like to associate with the portal. Keep in mind, the Authenticator defines the Security Group access policies, so the Authenticator must have properly configured Include/Exclude Groups to control user access.
Click the Next button and select any Firewalls you have created for use in this SSO Portal.
Click the Next button again and select any Translators you would like to translate requests for this SSO Portal.
Click Next again and select an XOTC Authenticator to enforce XOTC Authentication on the SSO Portal. You do not need to select a secondary authentication method, however it is strongly recommended.
Last, click the purple Save Portal button in the bottom right.
On the SSO Portals page you will now see a row for your SSO Portal in the table. Verify that the Ready column contains a green check mark.
Application Setup
Now that Xiid is fully integrated with LDAP, we can create an Xiid Application. The Xiid Application will act as an umbrella for all third-party applications that we want to integrate with Xiid’s Single Sign-On Portal.
Integrating various external applications is more in-depth and the applications to integrate will depend on your needs.
Follow these setup guide sections to integrate different external applications into your SSO Portals: