2-Factor Authentication Setup
The final step in completing the Xiid Software setup is to enable 2-Factor Authentication in the Single Sign-On Portal. 2-Factor Authentication has two sections, the first section goes over how to set up 2FA in Xiid’s environment. The second section will walk through setting up the Xiid Mobile Application to enable Xiid’s Patented and highly secure One-Time-Code 2-Factor Authentication for end-users.
Single Sign-On Setup
Start by signing into the Xiid Agent Management Portal and navigate to the 2FA tab.
Click the blue Add New 2FA button in the top right.
Provide the authenticator with a friendly name that associates the authenticator mechanism with the third-party applications (or Xiid Application umbrella).
Select the type of 2-Factor Authentication you would like to use. Xiid offers traditional OTP with your favorite authenticator mobile application. We recommend that you use the XiidID, which uses Xiid’s highly secure One-Time-Code 2-Factor Authentication for better security. For this installation, we will choose the XiidID.
Last, choose a duration of time with which the One-Time-Code will be valid for. Xiid generally recommends a 1-minute interval to give users a bit of breathing room while signing in.
Click the blue Create button to finish.
Now that we have our 2-Factor Authentication mechanism set up, we need to configure our Xiid Applications to use our new authentication.
Navigate to the Applications tab and click the orange pencil icon to edit the Xiid Application.
Click Next through the App and Authenticators section until you arrive at the 2FA section.
On the 2FA screen you should now see the new authentication mechanism listed in the table.
Select the 2FA and click Next until you reach the end and save the changes.
Now your applications are secured using 2-Factor Authentication!
Mobile Application Setup
The last step in setting up 2-Factor Authentication is to download, install and configure the Xiid Mobile Application.
Start by signing into the Xiid Global Management Portal and navigating to the Download tab.
Click the Download button on the orange icon for the Android Application.
Transfer the APK file to your Android device. Alternatively, you can sign into the Xiid Global Management Portal on your mobile phone and download the APK directly.
Tap the APK file on your Android device to install the Xiid Mobile Application. Please note that by default, Android does not allow apps outside of the Google Play store to be installed, so you may need to adjust your system settings to allow the installation.
After the installation finishes, open the Xiid Mobile Application. The application will ask you to set a 6-digit pin code as an added security measure for the app.
Once you have set your pin, you will be taken to the standard screen for 2FA. This screen will be mostly blank because there are no 2FA accounts set up yet.
Hit the Plus (+) button in the top right to create a new 2FA account on your mobile device.
Enter a description of the account that helps you associate your 2FA to your LDAP account.
Next, we need to navigate to the Xiid Single Sign-On Portal.
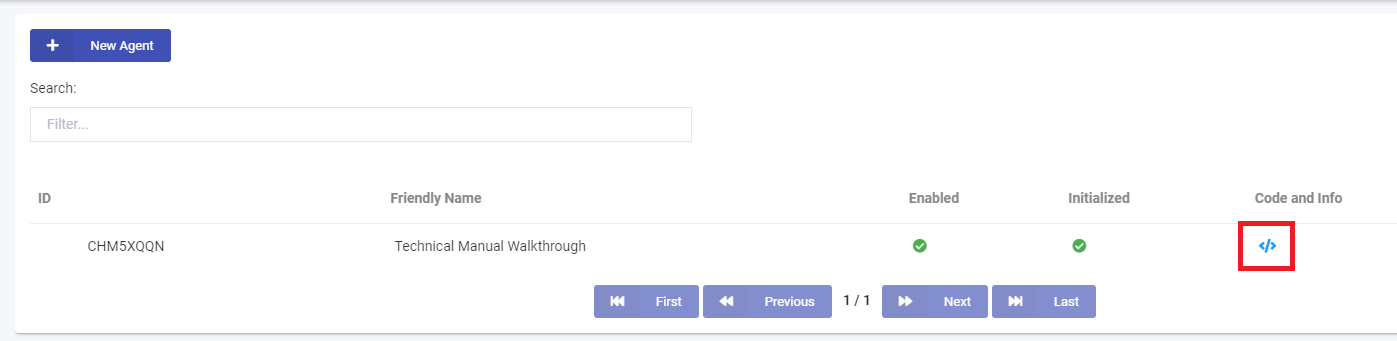
To locate the URL of your Single Sign-On Portal, sign in to the Xiid Global Management Portal and navigate to the Agents tab.
On the Agents Tab, find the Agent you have previously set up and click the blue </> icon on the row of your Xiid Agent under the Code and Info column. (shown below in red box)
This will pop up a window which will have your Agent Activation Code (not needed for this section) and underneath will be a link to your Single Sign-On Portal. Click the green Go button to navigate to your SSO Portal.
On the SSO Portal Screen, enter your LDAP Username into the username field. You must include the full domain after the username. i.e. user@domain OR user@domain.com.
Next you will be prompted to enter your password. This is the only time you will ever be asked for your username and password within Xiid’s Environment.
After entering your password, a window will pop up asking for your email address. Enter your email address here. Your email address is used from this point forward to recover 2FA from your mobile app.
After hitting the send button, a new window will pop up with a QR code.
Navigate back to your Xiid Mobile Application where you were setting up your 2FA.
Under the description field is a QRCode button. Click the button and scan the QR code.
After the QR code has been scanned, you should be taken back to the Xiid Mobile App home screen and there should be a new entry for your 2FA.
On the SSO Screen, you should be automatically logged in.
To verify that your SSO is fully set up and working, sign out of the SSO Portal by clicking your Account Icon in the top right and then click Logout.
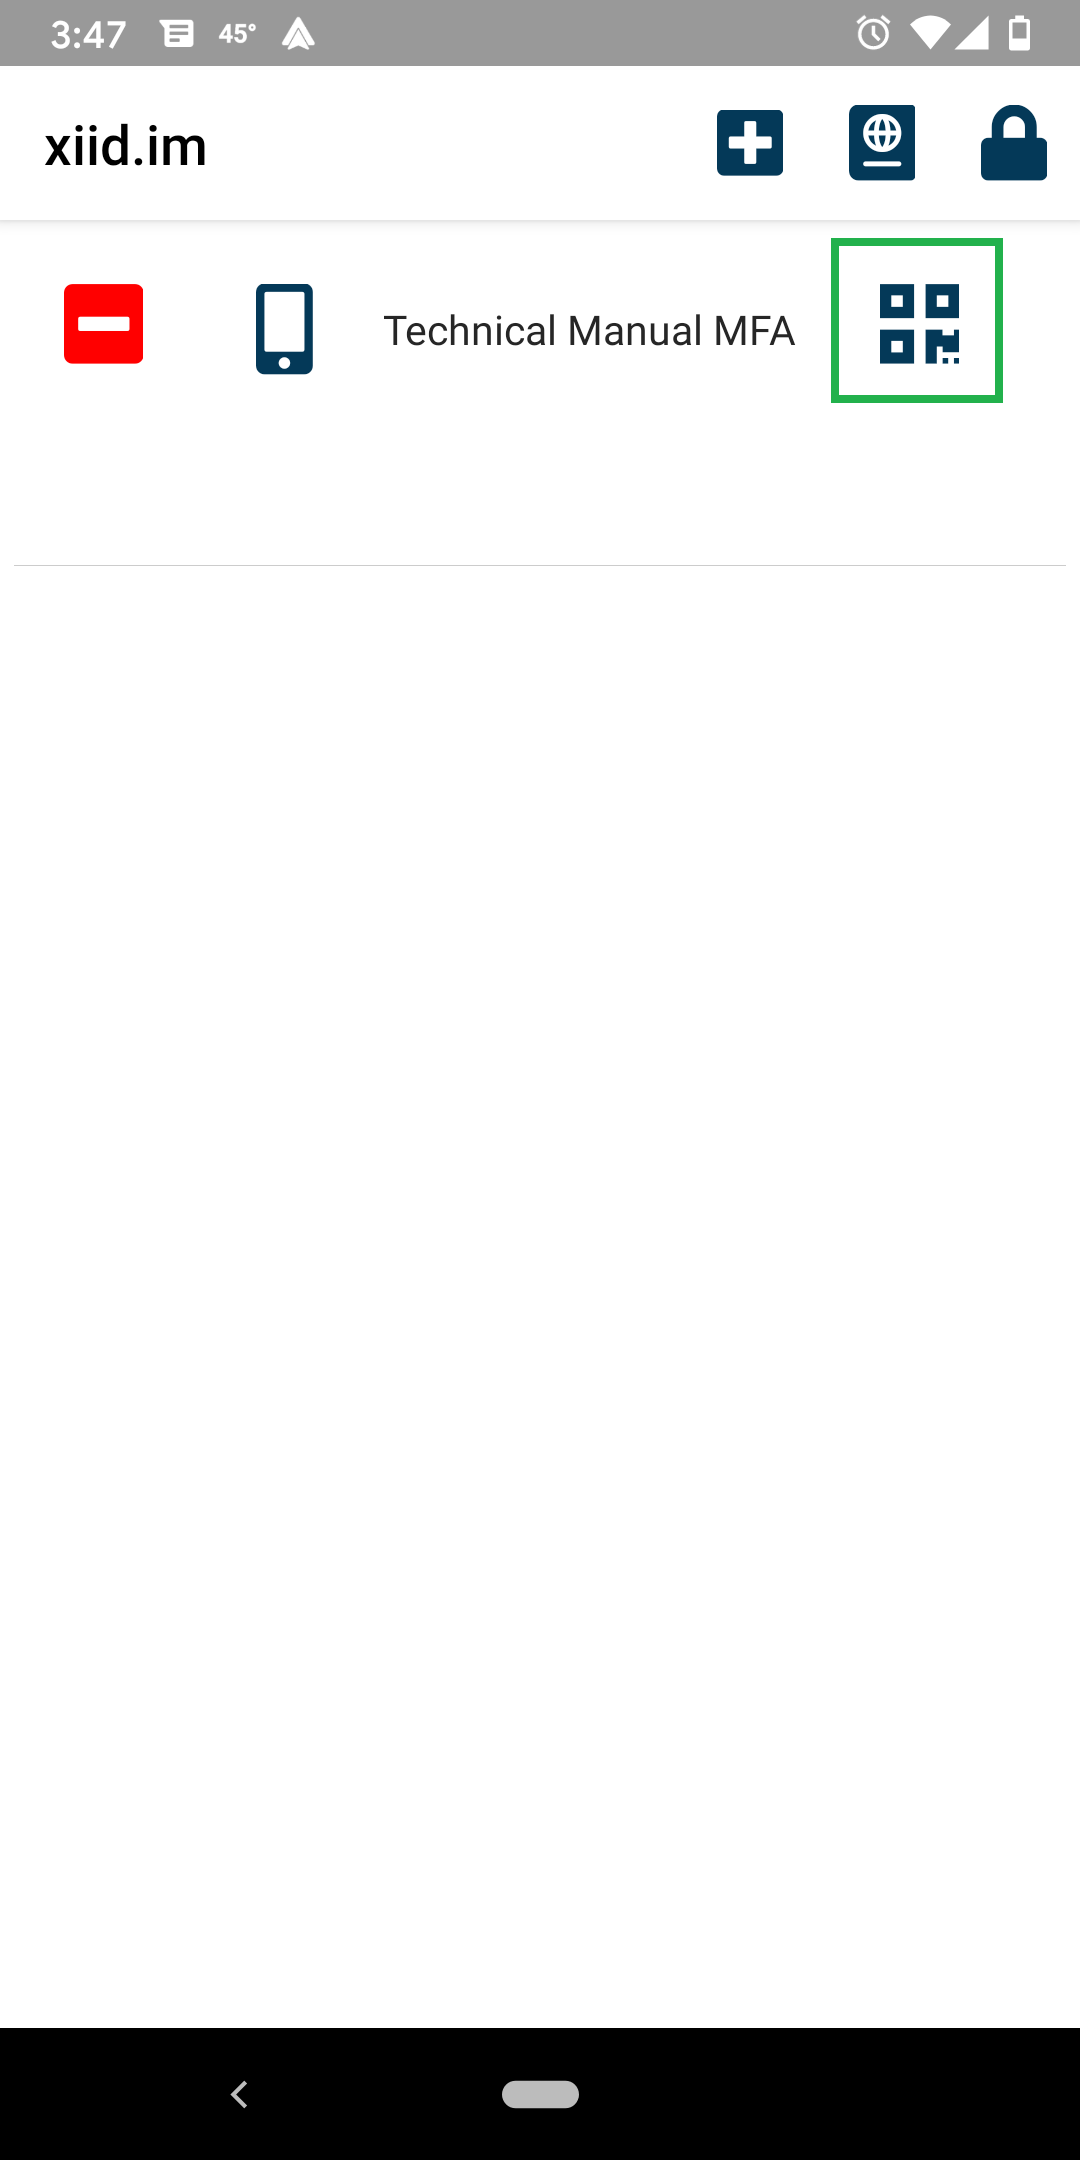
Once you are back to the Login Screen, open the Xiid Mobile Application and click the four dark squares next to your 2FA entry (Shown below in the green box). This will pop up a QR code scanner.
Scan the QR code under the username/XiidID field and you will be automatically logged in to the SSO Portal.
Now you are fully set up with 2-Factor Authentication using Xiid’s secure OTC technology!
Connect to RDP
The final step to round off the installation guide is to connect to your RDP instance using the Single Sign-On Portal.
Sign in to the SSO Portal using your newly set up Xiid Mobile Application 2FA entry.
You will be taken to the home screen for the Single Sign-On Portal where you will see your available SSO-enabled applications. In the case of the installation guide, you will see your RDP Application available.
Notice that the RDP and WRA buttons are grayed out initially.
To access your RDP Application, start first by clicking the blue Monitor button in the center of the Application card (shown in red box). This will generate your dynamic RDP credentials and start an RDP Session.
After clicking that icon, the buttons should change a darker color indicating they are no longer disabled.
Click the RDP button to download the RDP connection file to connect to your instance. (shown in green box)
You can also click the WRA button to download the Xiid RDP Wrapped connection with additional security. (shown in blue box)

Run the RDP or WRA to connect to your remote machine.
You will be prompted to sign in using the service account created in the IdP Consumer section (i.e. xiid-rdp-creds). The password was copied to your clipboard when you created the RDP Session above. Paste the password and you will connect to the remote machine.
The one time password must be used within 30 seconds and is only valid once.